16-bit color is one of those things that is widely misunderstood in the world of photography and video. The technical description of 16-bit color is that it is an increase in the number of colors available to the camera system. Increasing bit depth also provides increases in the number of possible luminance values. A typical 8-bit image such as JPG stores 256 levels of brightness, while 16-bit color stores 65,536 levels of brightness. When people talk about “recovering shadows” in an image, that is largely dependent on the increased number of brightness levels.
256 brightness levels is enough to provide a good quality image on most screens, but it isn’t enough to recover shadows from 5-6 stops underexposure. The reason is this: if an image is underexposed then it means the image data is pushed into a narrower range of brightness levels. Due to quantization, when the analog image is conformed as 8-bit color depth the extra luminance data is thrown away. When that data is thrown away recovering the image results in a lower quality result. This is why 10-bit, 12-bit, 14-bit, and 16-bit cameras exist.
While 16-bit color is a real thing, it should be noted that it’s often not a real thing in cameras or in computers. What does that mean exactly? Well, lets first talk about Adobe Photoshop. When editing “16-bit” files in Photoshop the files aren’t actually 16-bit, they’re 15 bit. Why is that? Simply put, when Photoshop was created over 20 years ago the good folks at Adobe decided to cut 1 bit of color resolution from the files to reduce the processing required of the computer.
Issues also occur when trying to divide up images into 65,536 luminance values. Imagine trying to divide anything up into 65,536 distinct levels. Now try doing that across 50 million individual pixels. It actually starts to be the case that light is the limiting factor. Because photons are discrete units, the quantity of photons required to render a scene in 16-bits is insanely huge.
Everyone should be familiar with the idea of a photon. A photon is what bounces around and allows us to see things. A photon is a single particle of what we call “light”. Photon’s do not travel uniformly across space, they travel in packets. These packets of information result in something called “shot noise”. Because a photon is a single unit, photon detectors do not work well when there are not a lot of photons available. Essentially, the bit depth of the sensor is limited by light itself. Even with a perfect sensor, the number of photons hitting the sensor would have to be around 2.916352e+12 to achieve 16-bits of color depth for a camera like the Canon EOS R5.
Camera sensors are actually not designed to reach 16-bits of color data. If they were, they’d have much lower sensitivity to light. Lower sensitivity equates to more photons gathered which equates to more accurate color. The reality is that if you shoot at anything but 100 ISO or lower, the image will overexpose before enough photons are gathered to create a 16-bit image.
The main benefit of 16-bit RAW files is this:
While acquiring 16-bit images may be a confusing morass, editing in 16-bits still has some advantages. These advantages deal with data retention when adjusting things like exposure, shadows, highlights, etc. While the final images from our cameras may only be 12-14 bits, placing those files into a 16-bit container allows the image data to be shifted around without moving it outside of the color space.
There are a couple of ways to demonstrate this effect. First, I will take a slightly underexposed image and adjust the exposure in Photoshop.
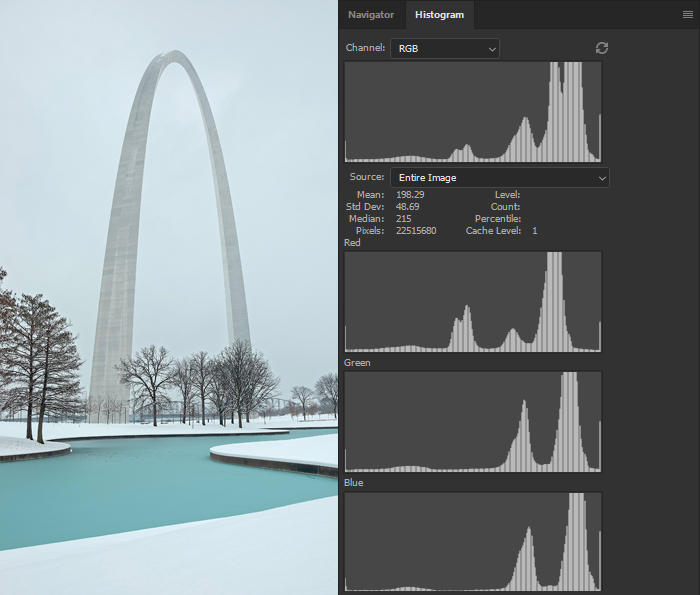
The first image is the version that was edited as a 16-bit file, you can see that the histogram is nice and smooth.
When looking at the histogram for each color channel each position on the curve is a grey level.
Example #1:
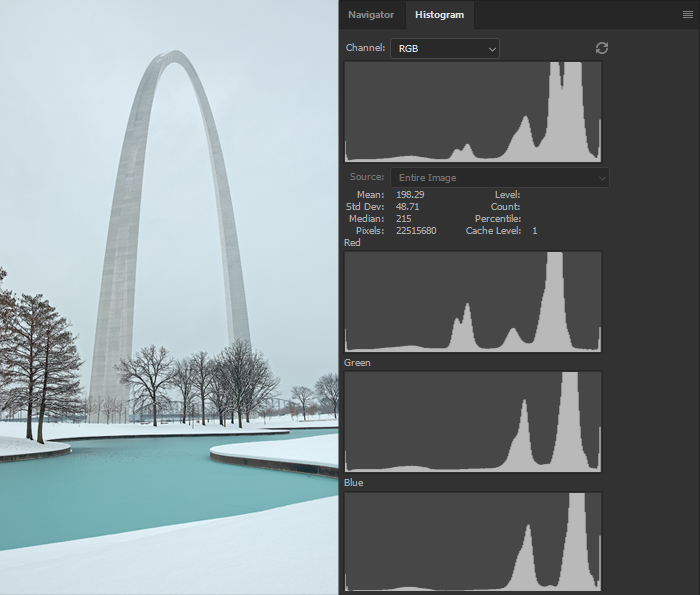
In the second image below is the version that was edited at 8-bit color depth. Again, all I did was adjust the exposure slightly. You can see in this histogram that there are vertical dark lines, those dark lines are gaps in information caused by the expansion of the data within an 8-bit container.
Example #2:
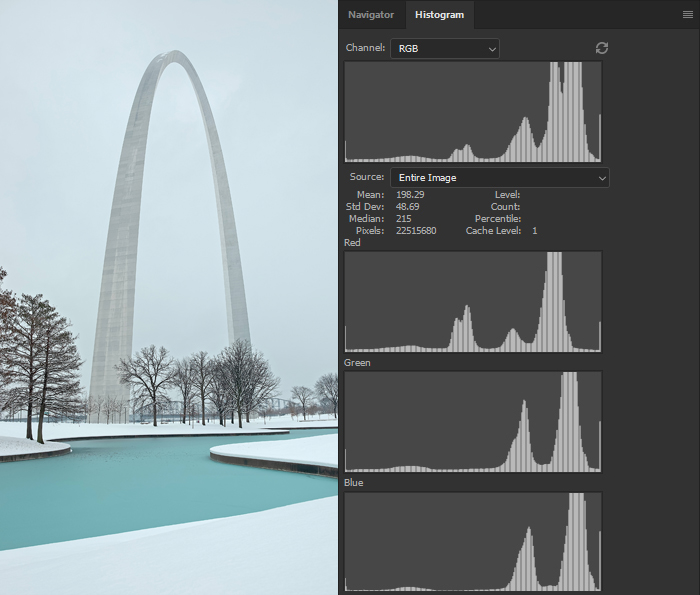
Gaps in information occur when editing the 16-bit file as well. The difference is those gaps don’t affect our data because there is so much more space available in the 16-bit file. Remember that an 8-bit image allows for 256 levels of brightness while a 16-bit image allows for 65,536 levels of brightness. Which just so happens to be 256 times more information (256 * 256 = 65,536).
If you edit in 16-bit you can freely adjust things like exposure and levels without worrying about degrading your final output image.
For instance in the following images I will edit a gradient in 8-bit and 16-bit using the levels tool. Just look at what happens.
In the first image I take a gradient saved as 16 bit image file and using the levels tool I compress the output levels, apply the effect, then run levels again and use the input levels to expand the image back. As you can see the gradient is still pretty smooth in the 16-bit edit below.
Example #1:

The 16-bit edit shows no ill effects and is still smooth on my screen.
I saved what I did with the levels as an action and ran the action on an 8-bit version of the gradient, below is the result.
Example #2:

No it’s not your eyes or your screen, the 8-bit edit doesn’t have enough information left in it to expand the gradient back out resulting in the “stepped” appearance seen above.
Example #3 is a side by side showing a 16-bit and 8-bit versions of the same image treated the same way as the gradients above.
Example #3:
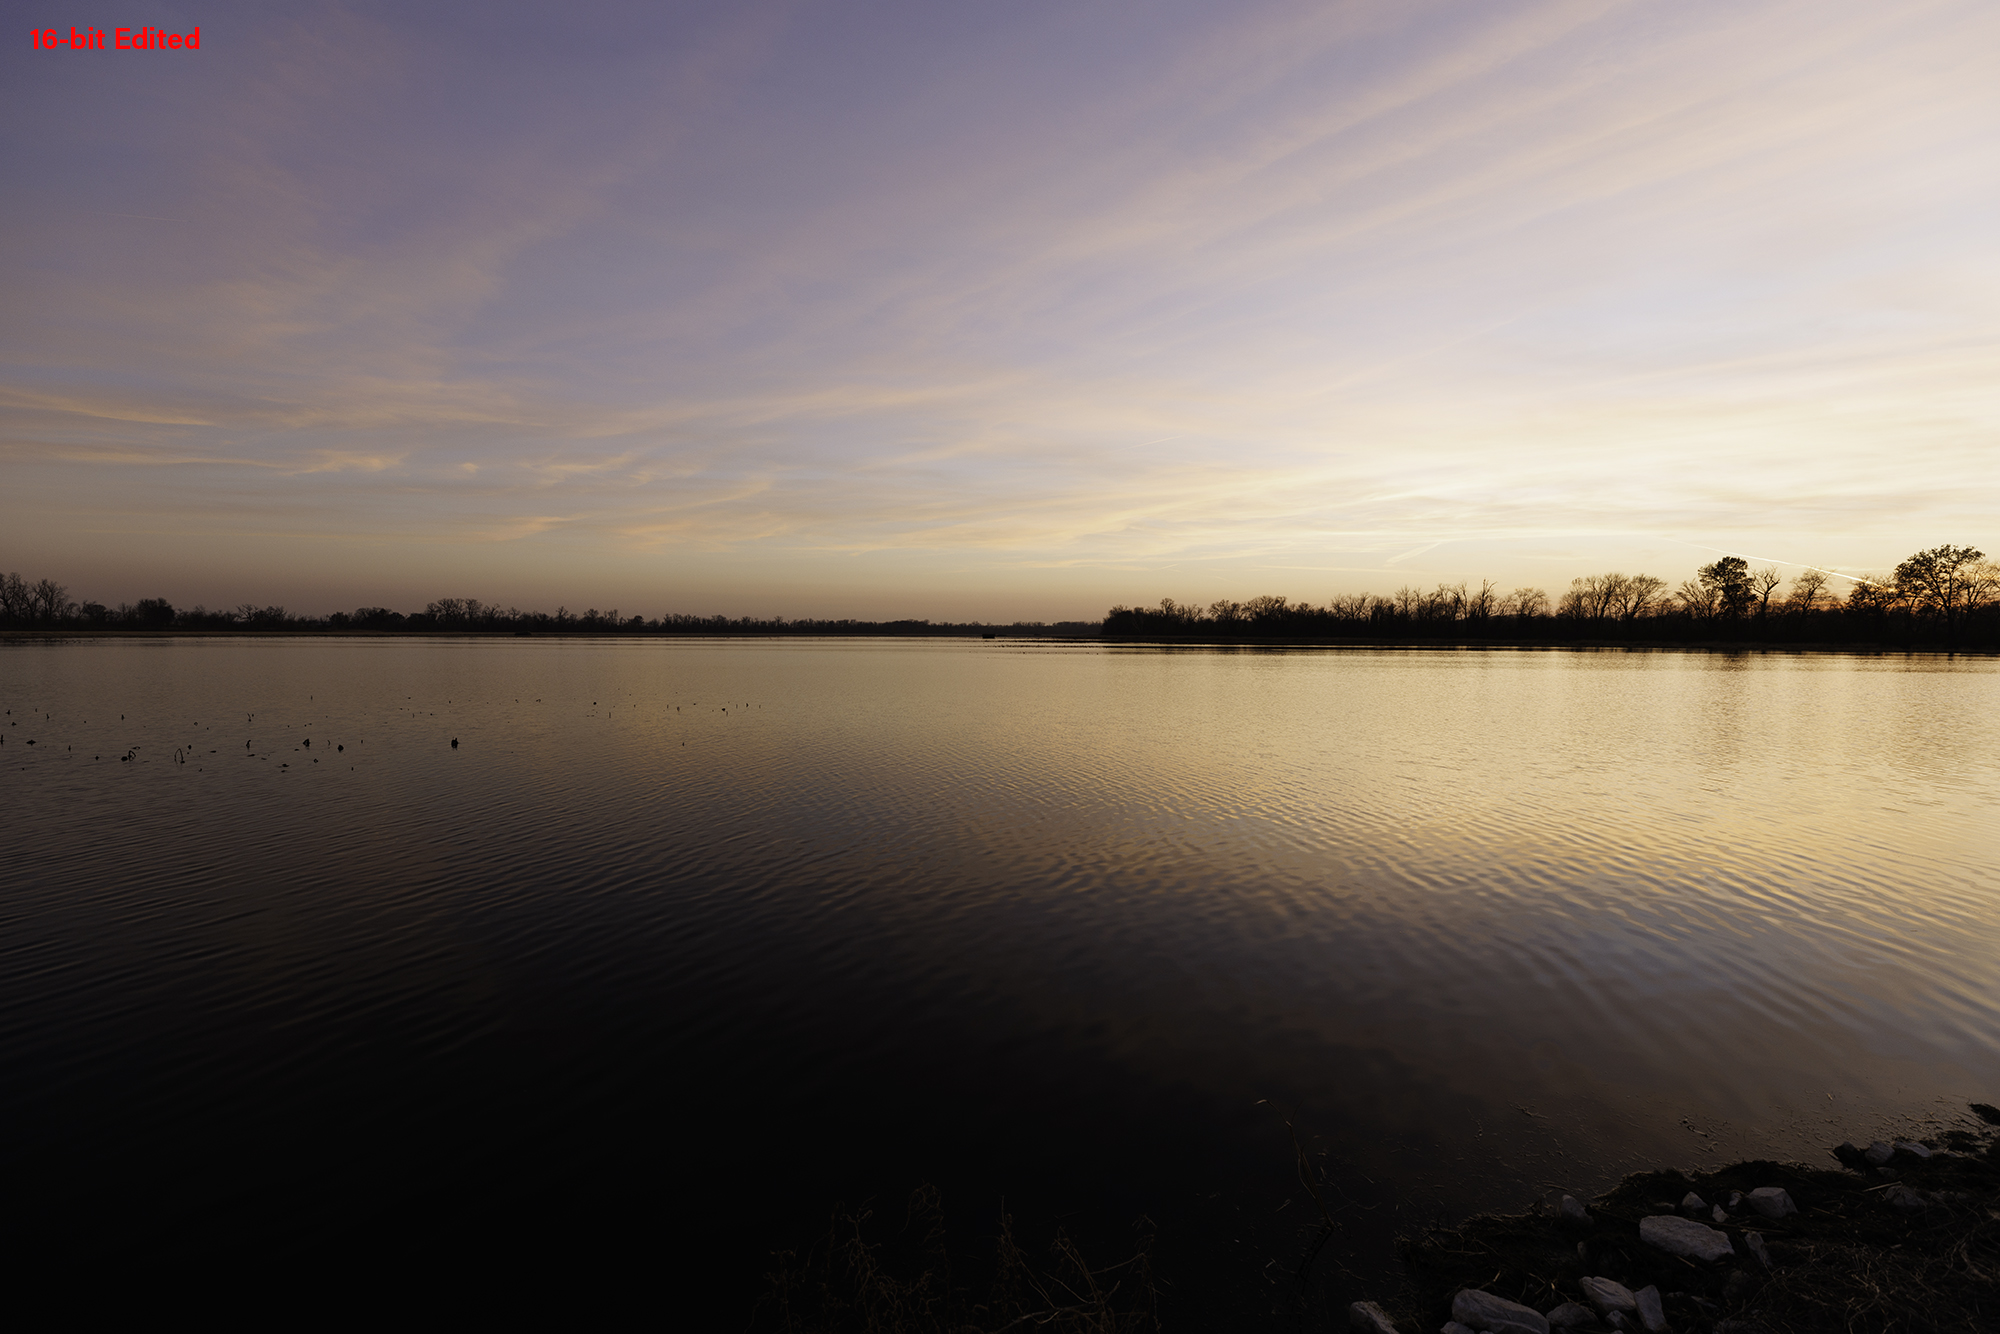
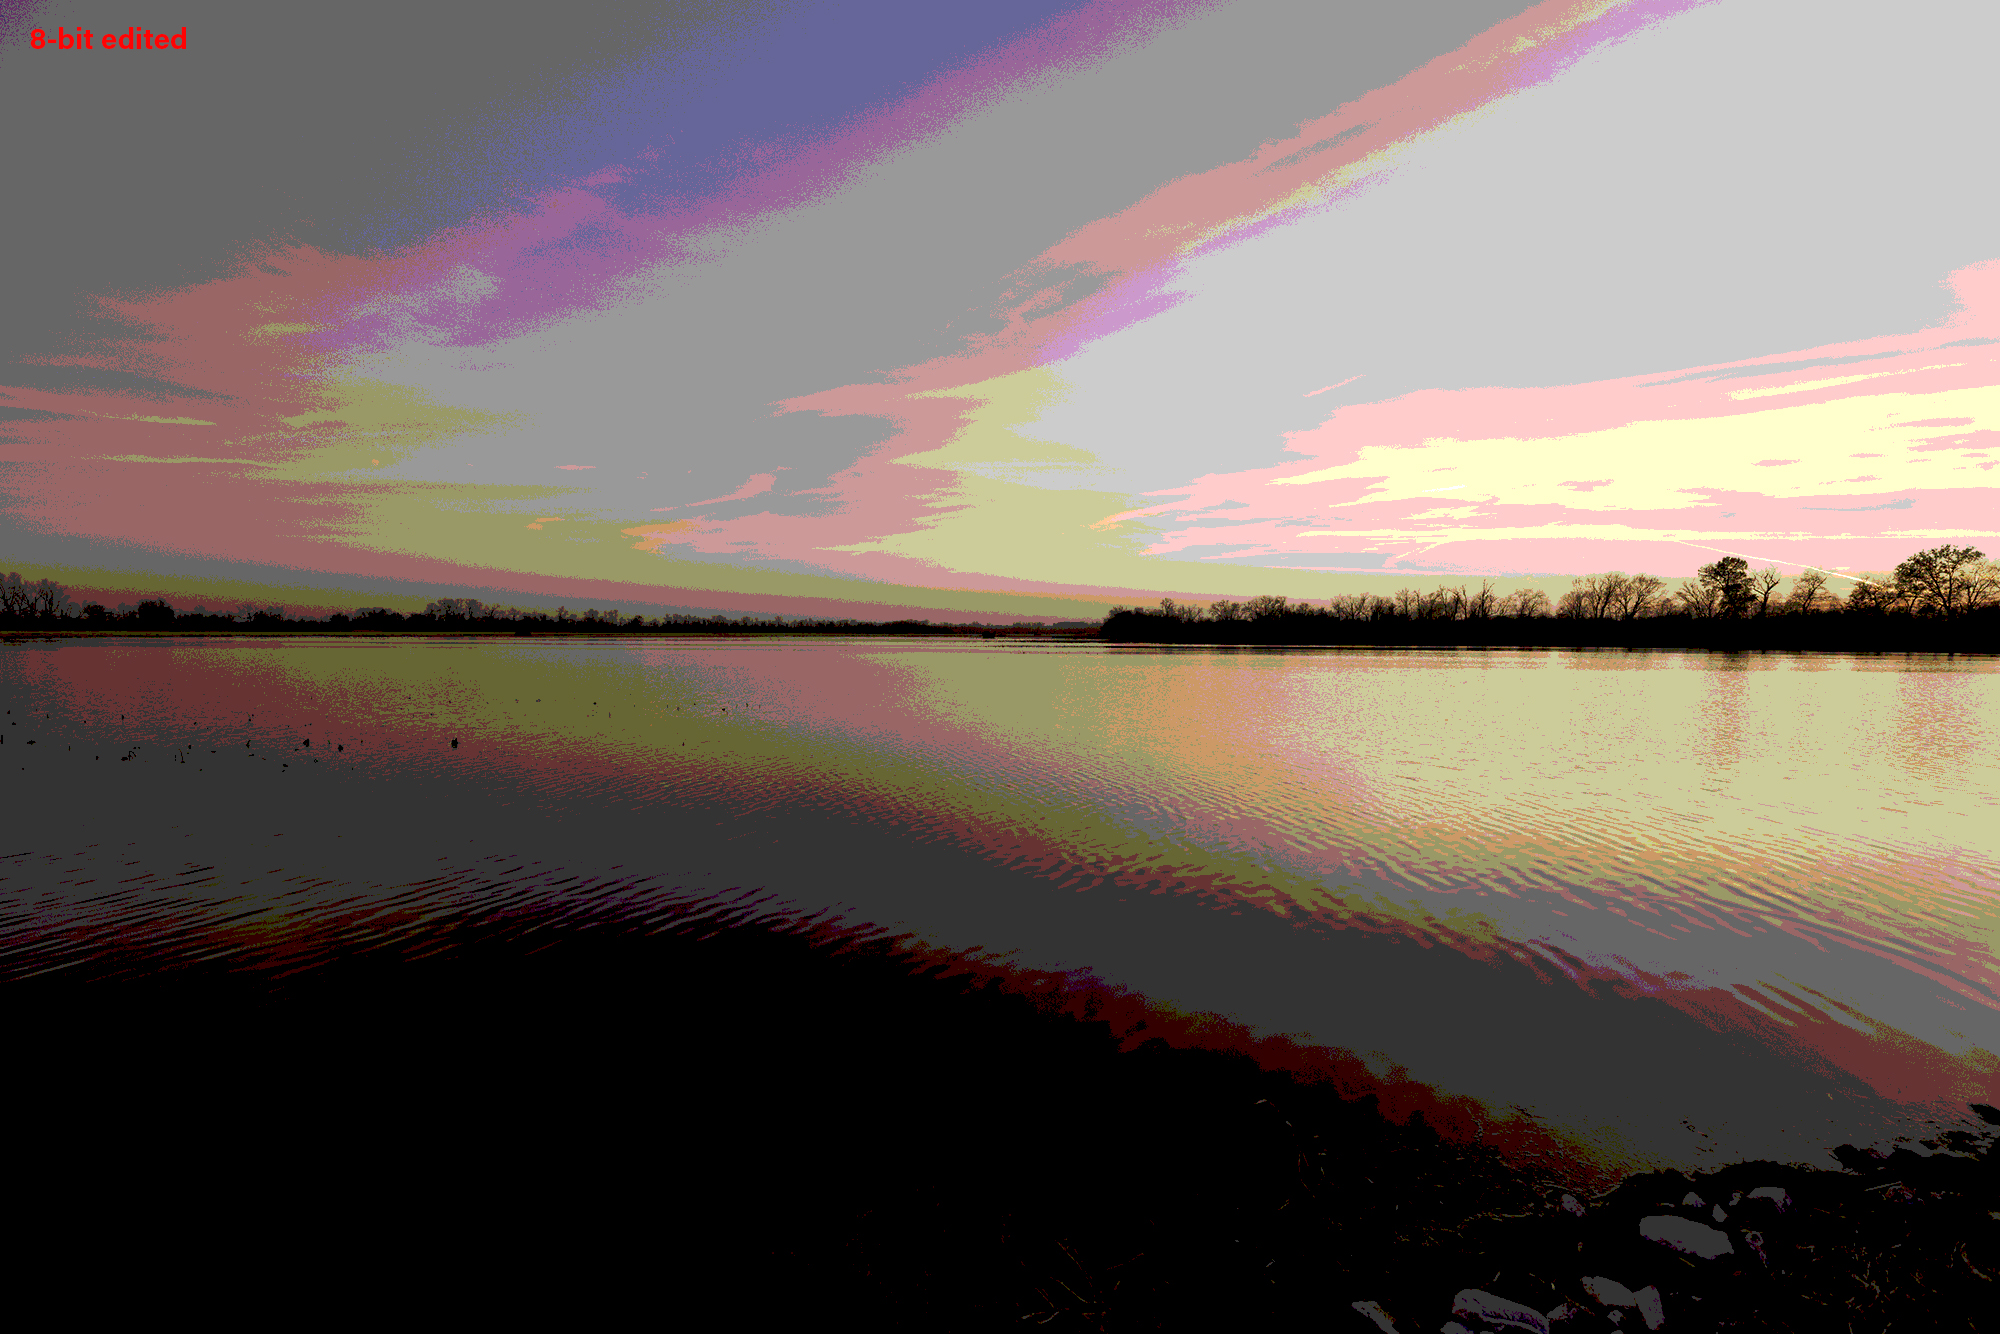
As you can see the 16-bit image retains a good quality image. It has enough overhead that it will allow you to make all the edits you need and still end up with a great looking image. On the other hand, the 8-bit image is showing that it has lost most of the image data after the levels action was performed.
While this may be an extreme example it is indicative of how shadow recovery will work on a specific camera. Cameras with higher bit-depths will have more data at the extremes of the histogram that can be used to fully recover shadow areas.
Most cameras don’t use 16-bits per channel for RAW files, they’re typically in the 10-bit to 14-bit range. So you might be wondering if it is ok to use 8-bit if your camera only support 10-bit RAW files. The answer is that the same rules still apply! It may look like 10-bit is “only” 2 bits different from 8-bit. But, while an 8-bit image allows 16.7 million colors, going to 10-bits allows for 1.07 billion colors. Yep, 2 extra bits add 984 million colors. That’s 58.8 times more color data, just from 2 extra bits. Downgrading your 10-bit images is not a great idea.
I feel that if the information is there, our cameras are capturing it, we might as well use it. Again, this isn’t about whether you can see 16-bits of color, it’s mostly about avoiding image quality degradation when editing.
It should be easy, but is often difficult to see the difference between an 8-bit image and a 16-bit image using a computer. This is partially due to Adobe Photoshop. Photoshop is not 100% honest about how it treats 8-bit images. Photoshop uses something called “dithering” to make 8-bit images look more like 10-bit images. Dithering smooths out the steps between grey levels using an algorithm instead of stored image data.
There is also the fact that on the internet 8-bit JPG is still the standard. Between Photoshop’s dithering, and the internet standard of using compressed 8-bit image formats, it’s pretty much impossible to relate the differences between bit depths using images uploaded to the internet. (Because every technology in between is lying to you)
How to use “16-bit” color depth
If you’re wondering how to use 16-bit color depth, you’re in luck because I’m about to tell you. Step 1 is to shot in RAW not JPG or HEIF. Then, when you open your RAW files in Photoshop ACR simply click the button at the bottom of the window (highlighted in red) a window will popup. In the “depth” menu choose the 16-bit option. This will cause Photoshop to open the file in 16-bit mode when you’re done processing the RAW file.
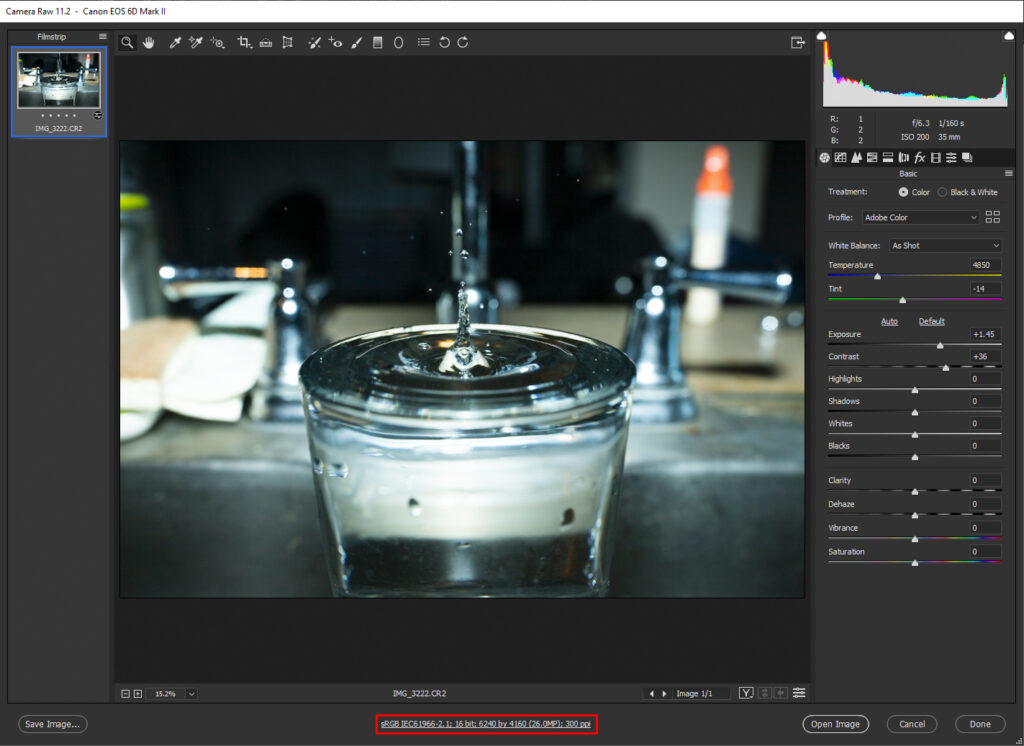
Click the button at the bottom of the ACR screen to bring up the options panel.
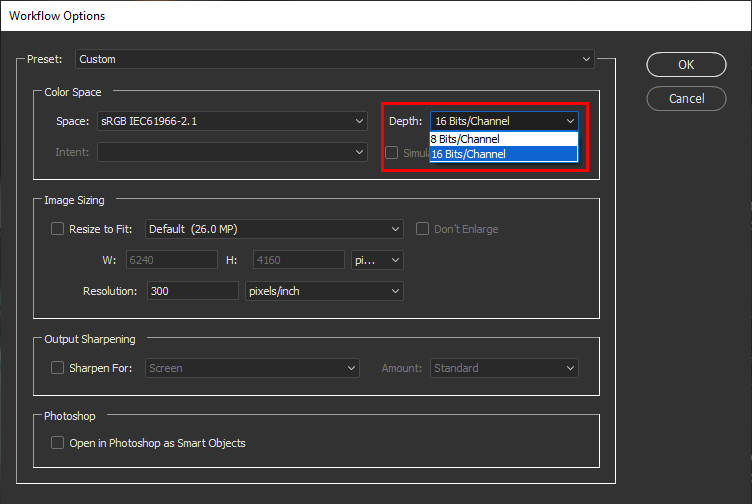
In the options panel choose 16 Bits/Channel under the depth menu.
If you need more help with your photography, check out our courses in the courses tab.

