Learning how to use ISO can be confusing. To start, know that ISO sets the sensitivity of the sensor to light. When the ISO is a big number, such as 12,800, then the sensor will be very sensitive to light. If the ISO is a small number like 100, then the sensor will be less sensitive to light. That is all that ISO is to the photographer, it is a setting in the camera that allows you to control how sensitive your camera’s sensor will be to light. If you would like more information on ISO click here.
Most of the time high ISO is used when there is not enough light to maintain a high shutter speed. But oddly enough, that doesn’t mean that high ISO is always the best answer for low light photography. In fact, it often isn’t the best answer. And I will explain why soon enough.
What ISO you can choose will be dependent on your camera model and the sensor inside of your camera. Some cameras are better than others with higher ISO settings, so all this information will have to be taken with that in mind. If you have an older digital camera your options for ISO may not be great and most of this post may essentially be irrelevant to you because your camera doesn’t work well at higher ISO settings.
As a general rule, using a high ISO to make the sensor more sensitive has negative consequences to image quality. This is due to how sensors work. Each pixel on the sensor changes light into an electrical charge. As light continues to hit the pixel it adds more and more electrical charge to the pixel. The more charge a pixel collects the brighter that pixel will be in the final image. After the exposure is done, the amount of charge in each pixel is amplified and measured.
Unfortunately, when I said that ISO increases the sensitivity of the camera sensor its actually not strictly true. What really happens is that changing the ISO changes the amplification of the charge contained in the pixel. Each full stop of ISO creates a full stop, or doubling, of the power of the amplification in the gain stage. The gain stage is an electrical circuit much like that in any audio amplifier (except much smaller). When changing the ISO all that is ever changed is the amplification stage of this signal processing.
Because the signal from the pixel is amplified according to the ISO setting there are negative consequences to increasing the ISO. As with any signal amplifier, if the signal is amplified too much, or from too low of a source, the result is that there will be a lot of noise present in the final result. A good way of thinking of this is your FM radio station. When the signal coming through on the station is nice and strong, the music is clear, but if the signal is faint, then the music may sound static filled and hard to understand. The same basic premise is at work inside of a sensor. A strong signal equates to a better picture just as a strong signal equates to a better sounding radio station.
As the signal is amplified it also causes clipping to occur in already brightened areas. This is referred to as headroom clipping and it can occur in digital and analog systems. This makes sense because as the ISO is increased in a basic image sensor the dynamic range will decrease relative to the increase in ISO. Since this is happening we can assume that the processing, whether analog or digital, has a fixed maximum for the amplitude of the charge value contained in the pixel. That “glass ceiling” leads to unavoidably losing dynamic range equivalent to the increase in sensitivity.
Read noise is increased as well as each stop increase in ISO indicates a corresponding decrease in the capacitive charge used to create the final image. As the ISO is increased the full data of the scene must be derived from a smaller and smaller fraction of the full charge capacity of each pixel. This leads to a variety of issues that occur with high ISO images. In cameras that have a base ISO of 100 changing to an ISO of 200 will mean conforming the scene data with half the available pixel well charge. And an ISO of 400 will require conforming the scene data using 1/4th of the available pixel well charge. And so on with every increase in ISO.
The series below show how noise levels in the image increase as the ISO is increased.
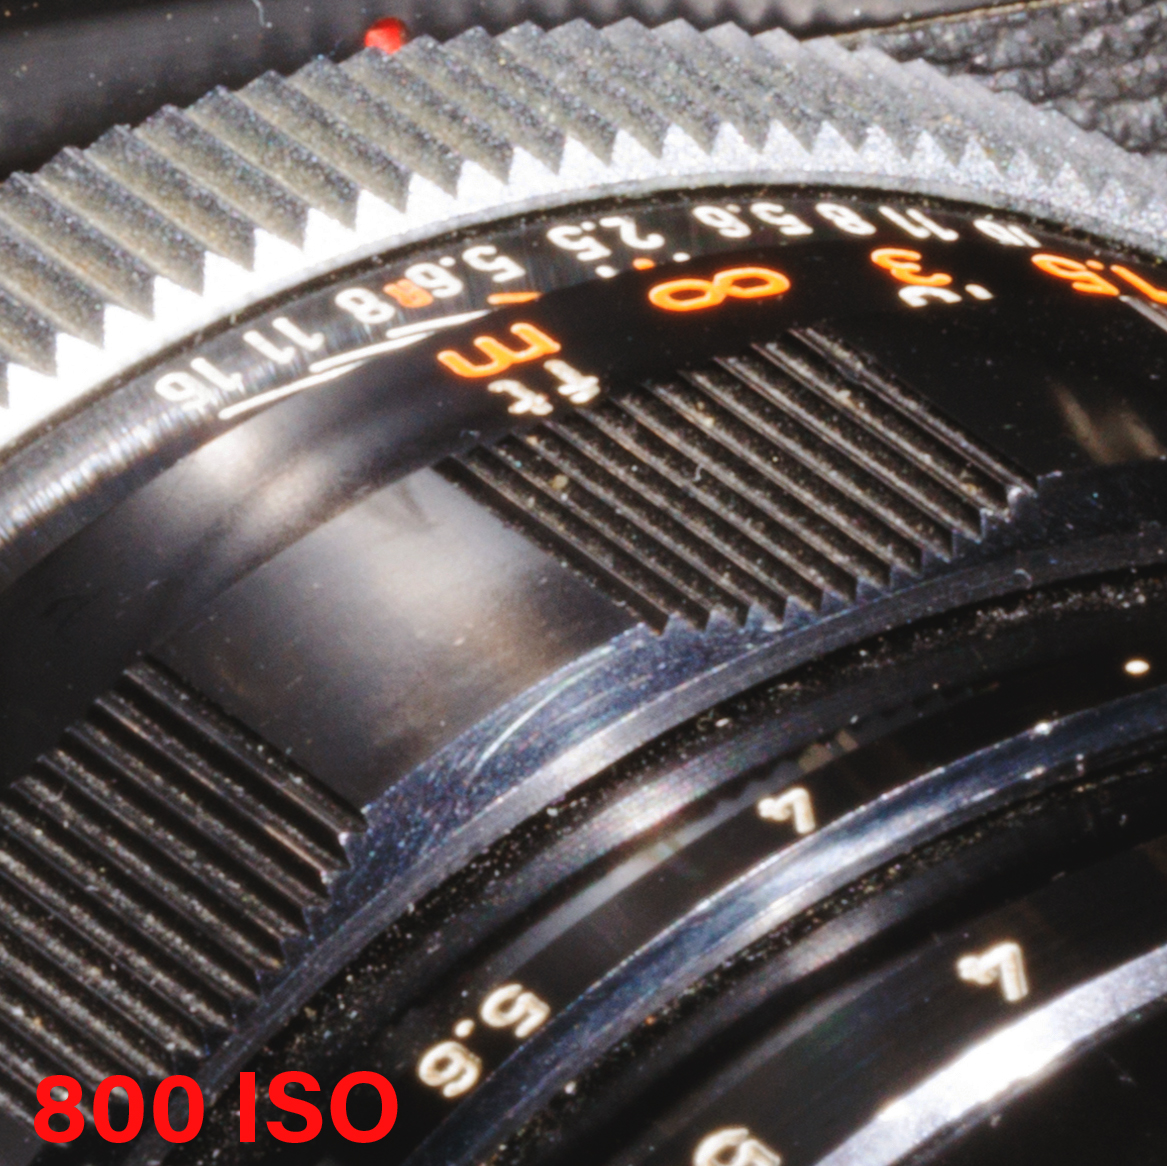
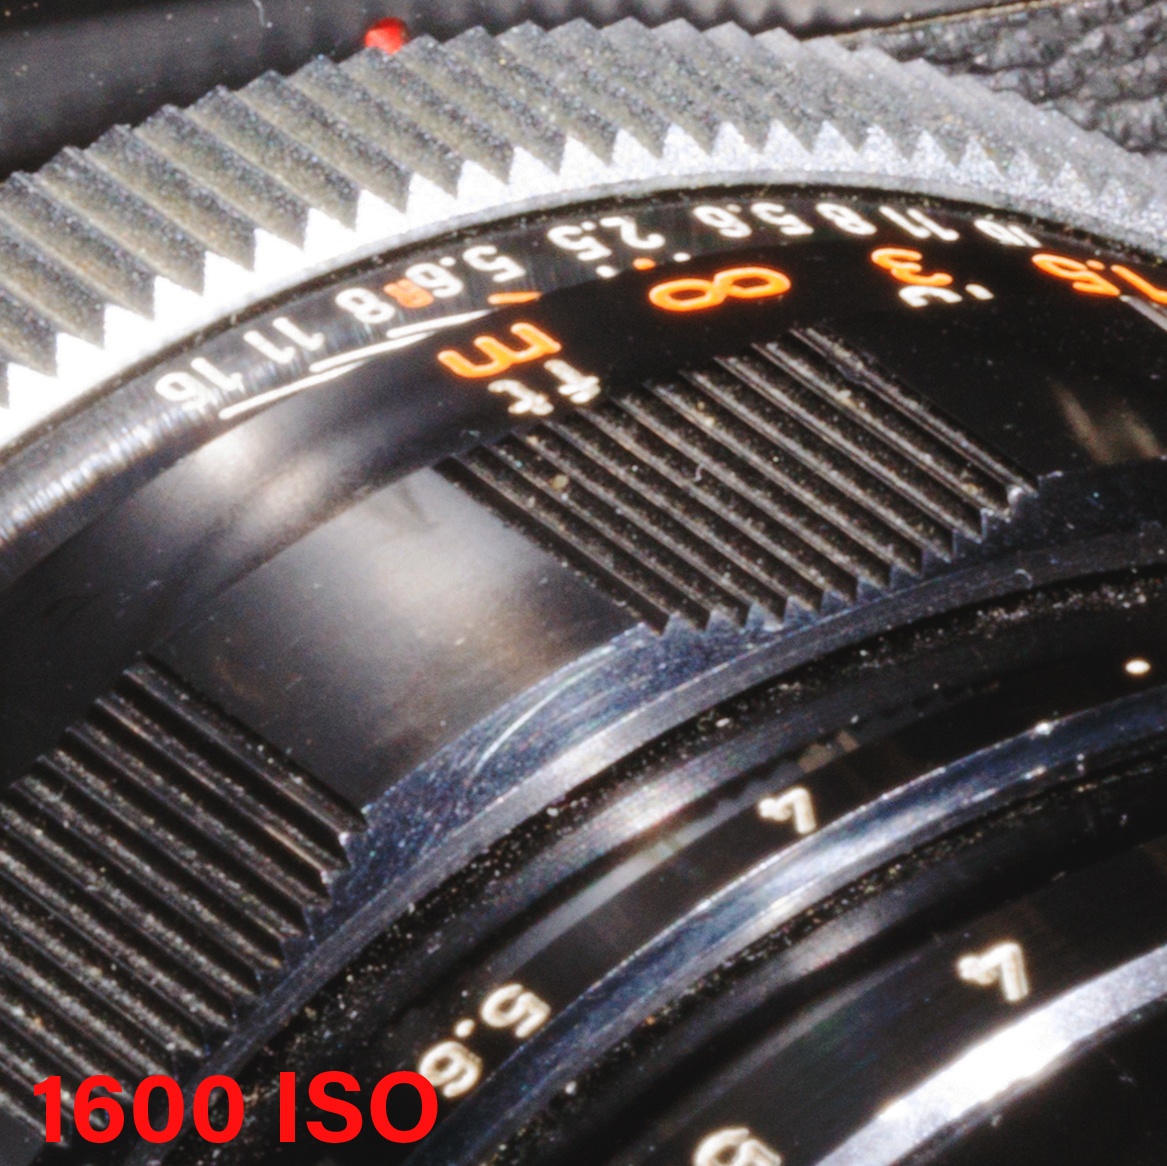
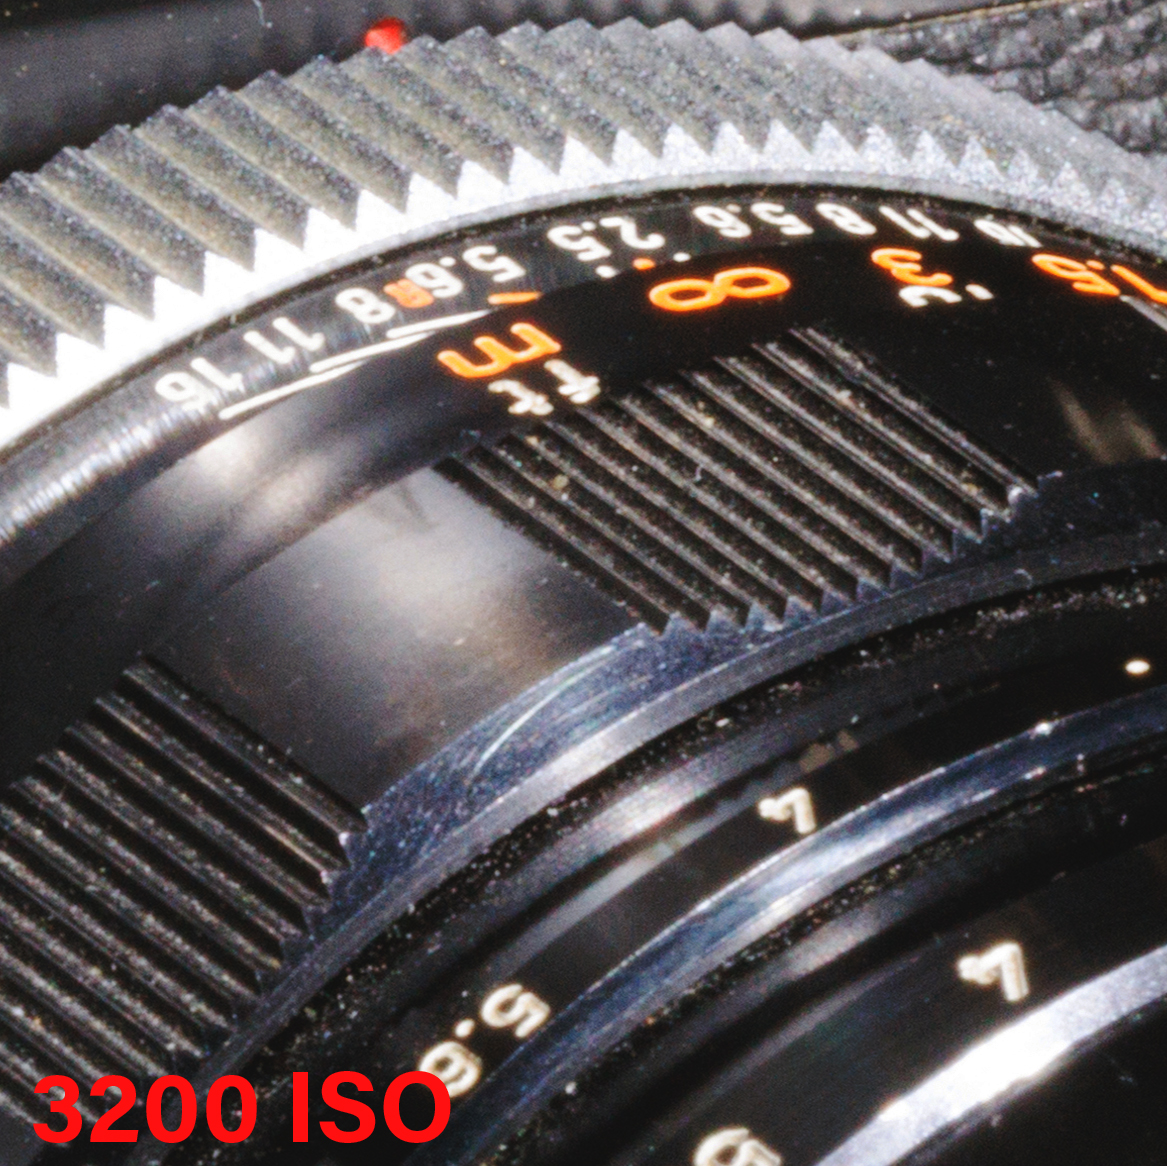


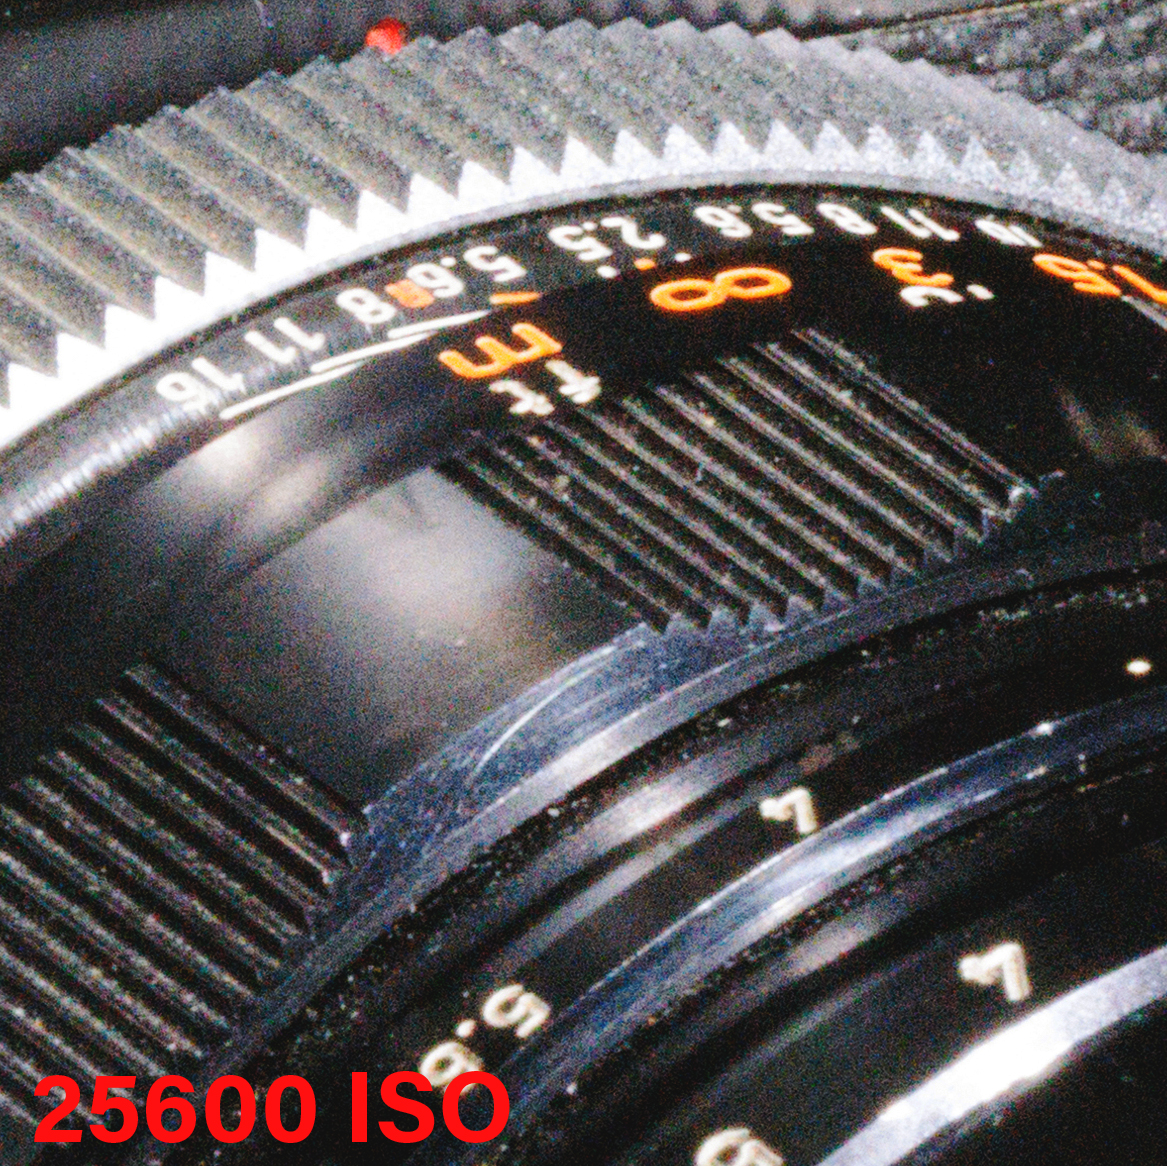
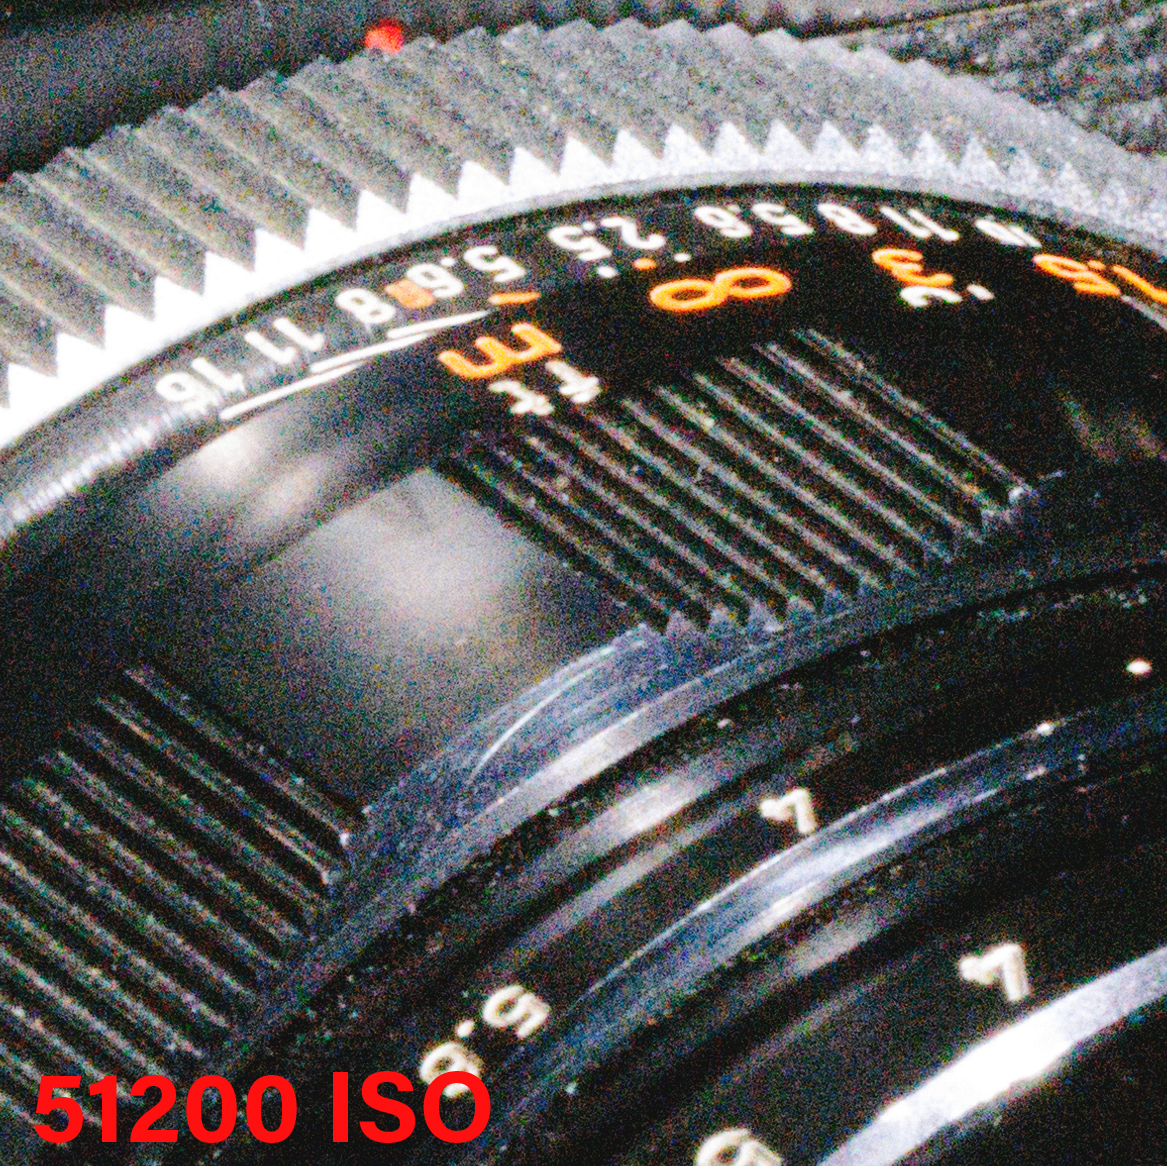
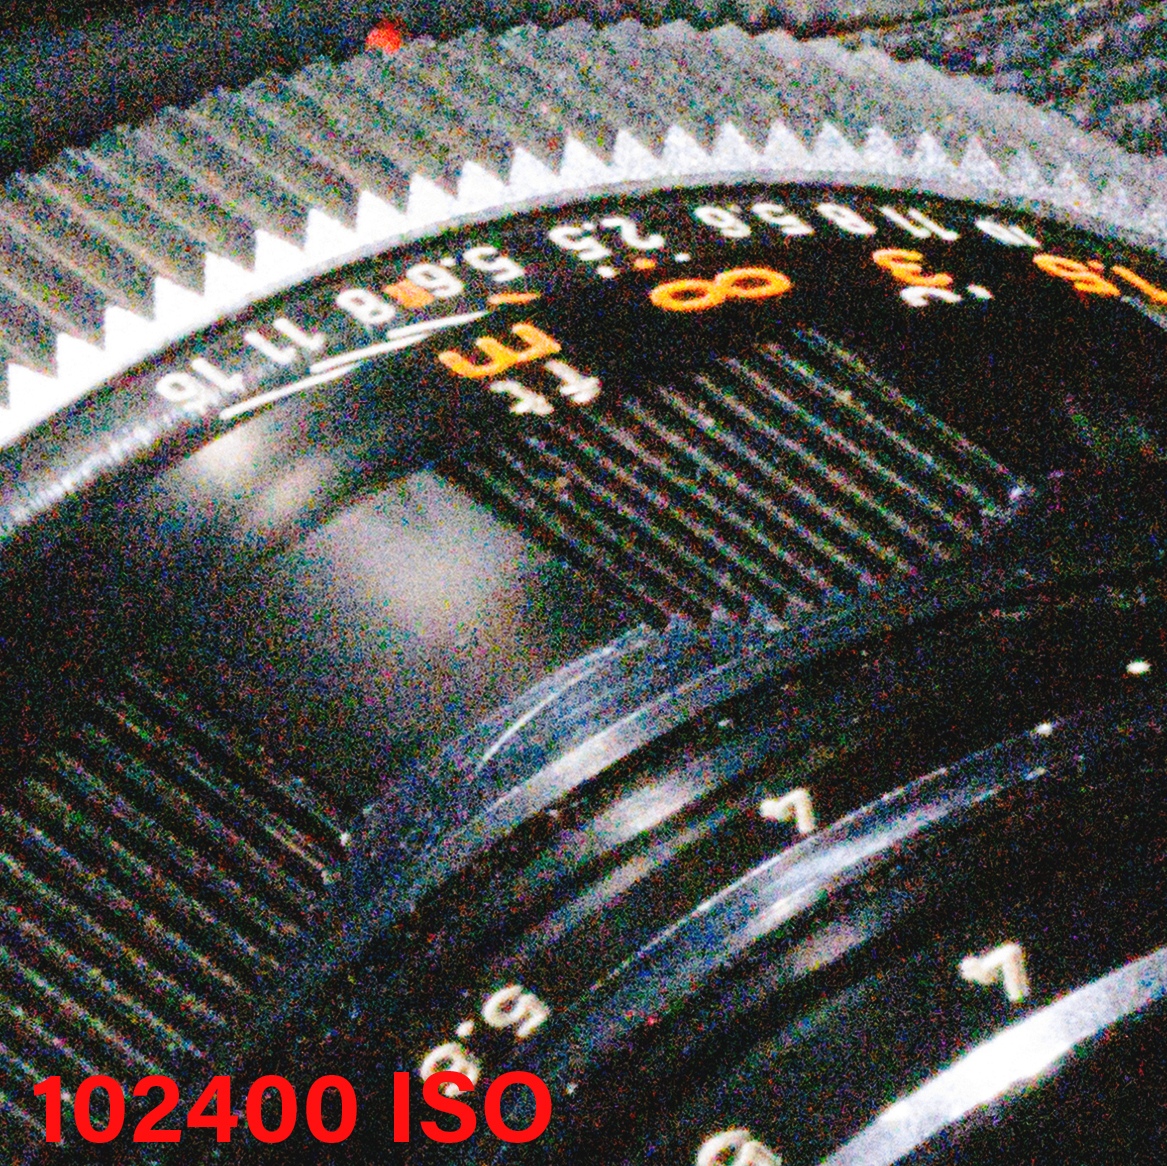
In this series you can see the effects on the image at each extra stop of ISO. Darker areas slowly begin to clip to black and dark areas contain large amounts of read noise by about 25600 ISO. At 102400 ISO the image is very noisy and it should be apparent that middle grays have also been impacted by the reductions in dynamic range.
Looking at the results it appears that surface reflectance plays an important role in visible noise levels within the image. If your subject is highly reflective, ie, brighter, then noise levels may not be an issue even at very high ISO settings. When deciding what ISO to use you should consider the surface reflectance of your subject. Even with intense directed light dark subjects cause a large increase in noise.
Another thing that can be seen is that high noise levels break apart fine details. You should assume that if your subject has a lot of fine details in it, or if you wish to retain fine details, you should avoid using a high ISO. “Details” doesn’t just refer to texture, but also color consistency and accuracy, gradient accuracy, and midrange brightness stepping.
Considering how quickly detail is lost in dark areas of the image one more no-no comes up for high ISO. Contrary as it may seem, you should avoid using very high ISO for extremely dark scenes. Instead, focus on using longer exposure times to increase the brightness in such scenes. This would include night sky photography or outdoor night photography in general.
As we learned above dynamic range is lost at higher ISO settings with this camera and most photography oriented cameras. Because that is true if you want to shoot scenes with high dynamic range such as back lit subjects or sunsets, use the lowest possible ISO to capture as much of the highlights and shadows possible in the scene.
The images above show that this camera performs best at high ISO in relatively bright situations. That may seem counterintuitive, but it basically means that the high ISO settings should be used to increase the shutter speed when the subject’s motion requires a higher shutter speed, not when the subject is poorly lit.
Thinking back to what we said about surface reflectance earlier we can derive that if you have to adjust the ISO higher to maintain a certain shutter speed, don’t favor lower ISO or underexposure, instead you should favor full saturation or even slight over saturation of the pixels, especially in low light. A 1/3rd to 2/3rd stop overexposure of the subject is preferred for this particular camera. This means that if you’re thinking you’ll slightly underexpose to get to a lower ISO that is incorrect. Doing that will simply increase the noise in the image. It’s better to use a higher ISO and get full pixel saturation for the subject. Since we know that noise in brightly lit areas is reduced, even at high ISO, then increasing the ISO so your subject is brightly lit is better than keeping your subject dark and using a lower ISO.
Knowing all this here are 3 rules for ISO:
- Always use the lowest possible ISO for a given shutter speed.
- Higher ISO’s work best when the subject appears bright in the image.
- Favor longer exposure times over higher ISO for extremely dark scenes.
To learn more about this and other aspects of photography, check out the LPS Courses section.


2 Comments
Thanks, this was very informative!
Thanks, this was very informative!