
Why use Freeze Frame
For an in depth discussion on why you should use your flash to freeze fast movement check out this article on why you should use your flash instead of your shutter to freeze fast movement.
The gist is that flash avoids some common pitfalls and limitations of the camera shutter enabling us to better capture the image we want to capture for this product shot.
Supplies
You need a background of some sort, a rod like a wooden dowel to hold the product, and hot glue for attaching the subject to the dowel. One trick when working with hot glue is to glue the object on and hold it still then run everything under the faucet, this will quickly cool the glue down and it will be solidly attached. The glue is plastic so water has no effect on it.
Taking the shot
In this tutorial we will harness the high speed of our flash to create a stunning product shot of water splashing on a bottle of nail polish.
I taped my construction paper up behind my subject, and used a clamp to hold by dowel rod vertically in the air. I also set up my lights with a light in front and a light behind the product to give this picture:
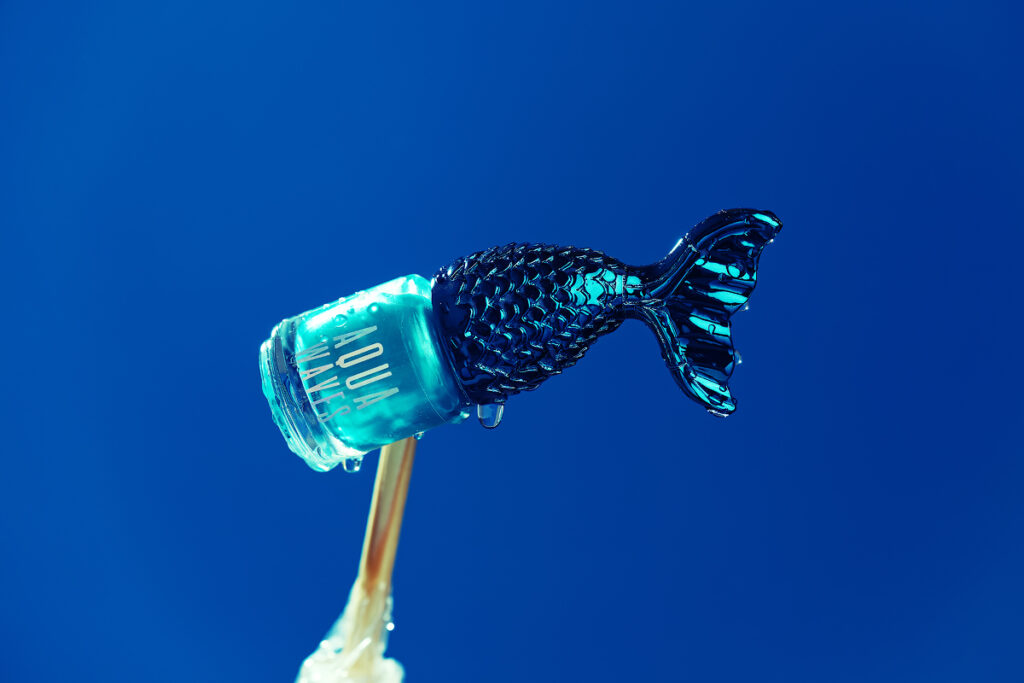
I also glued the dowel inside a PVC pipe for added support, without that the dowel would be wobbling all over every time a splash of water hit it.
One of the key things I did for this test was use the mirror lockup function in my camera. That gives a split-second faster response when pressing the shutter button which can be very helpful for this type of shooting.
I had my friend drop water from a cup on the nail polish about 150 times which took awhile to accomplish. But through a lot of effort we ended up with the following shot:

To accomplish this, I had my camera on a tripod using a 70-200mm lens at f/5.0. I used a shutter speed of 1/160th of a second, and an ISO of 200. I chose to use a low ISO to get maximum image quality. I had my flashes set to manual mode with the key light inside a soft box at 1/32nd power, and the rim light at 1/128th power. I tried to use the lowest power settings possible to ensure that the flash duration was very short and would perfectly freeze the water.
After taking the photo of course I brought it into photoshop and removed all evidence of the wooden dowel. I also made some adjustments to the color and background of the image.
I think the photo turned out well. But if I was going to do this type of photography for a large client, I would want to make something that could easily drop blobs of water from above. It’s really a question of split-second timing and having a machine that would drop blobs of water at set intervals would allow me to really dial in the exact moment I want to capture.
I encourage you to try out this type of photography for yourself like I did here in the comforts of my own home!
If you’re interested here are a few other shots I thought were interesting.
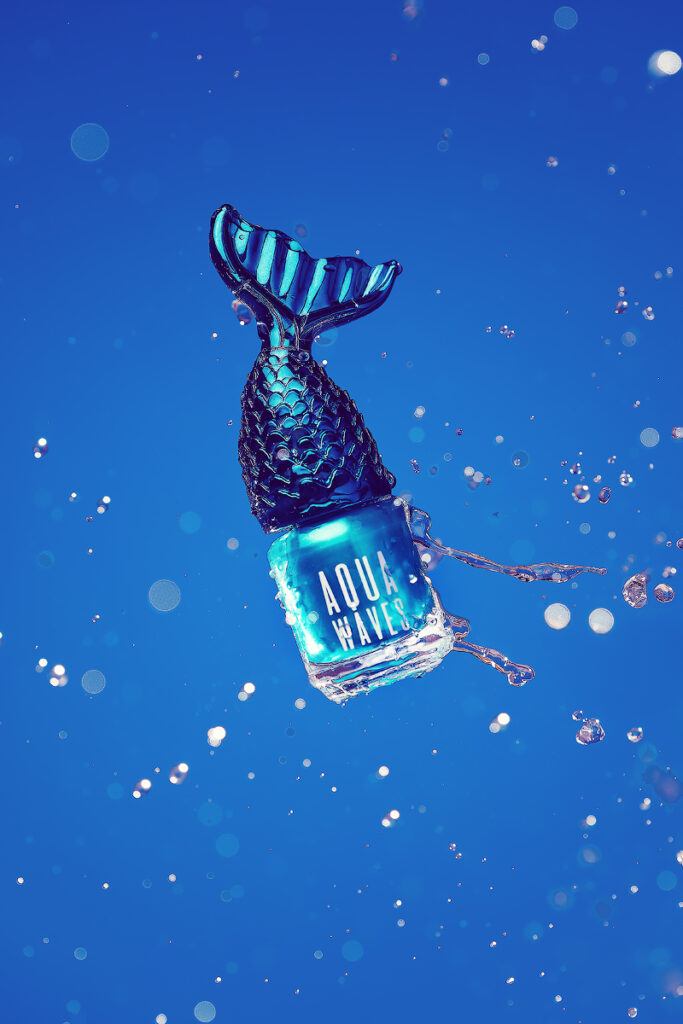
Here are some rejected shots I thought looked cool just to see how the water hits the object.


Hope you enjoyed this article. Don’t forget to subscribe to our newsletter to get notified when new content is published!