
In this tutorial I’ll be showing you how to create a color Look Up Table or LUT for color grading using any editing program whether it supports LUTs or not. As long as you can edit a .PNG you can make a LUT file using this method.
In this tutorial we’ll be using a free online LUT Generator tool. Using the LUT generator we will apply the effects of our edits to a special image called a HALD. We can apply all the color adjustments we want to the HALD using any porogram we want, then the LUT generator will turn that edited HALD file into a real 3D LUT that can be used in Photoshop, Premier, DaVinci Resolve, and many others.
Get the LUT Generator
The first thing you’ll have to do to get started is download the key component of this tutorial, the LUT Generator from IWLTBAP. Don’t worry it is FREE and safe.
In this tutorial I’ll be using Photoshop but you can use any imaging software you want which is the whole point of this tutorial.
Edit your starting image
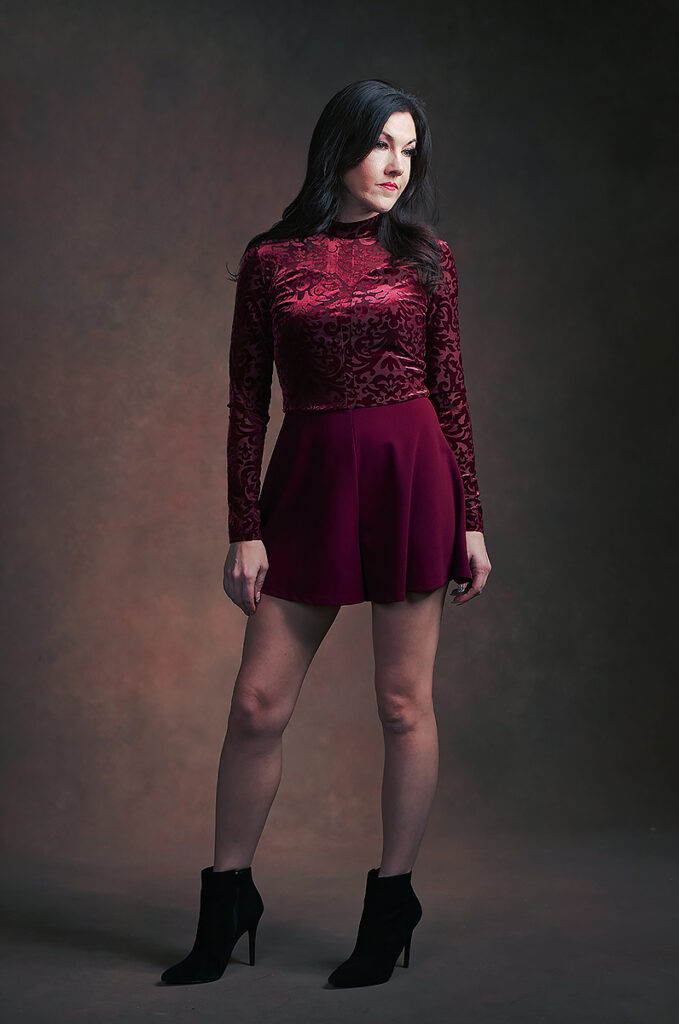
Below is the image I will be starting with. I found it is best to start with an image that is as close to SOOC as possible. This will make your final LUT much more flexible. My goal with this LUT is to add contrast and remove some of the warmth in the image.
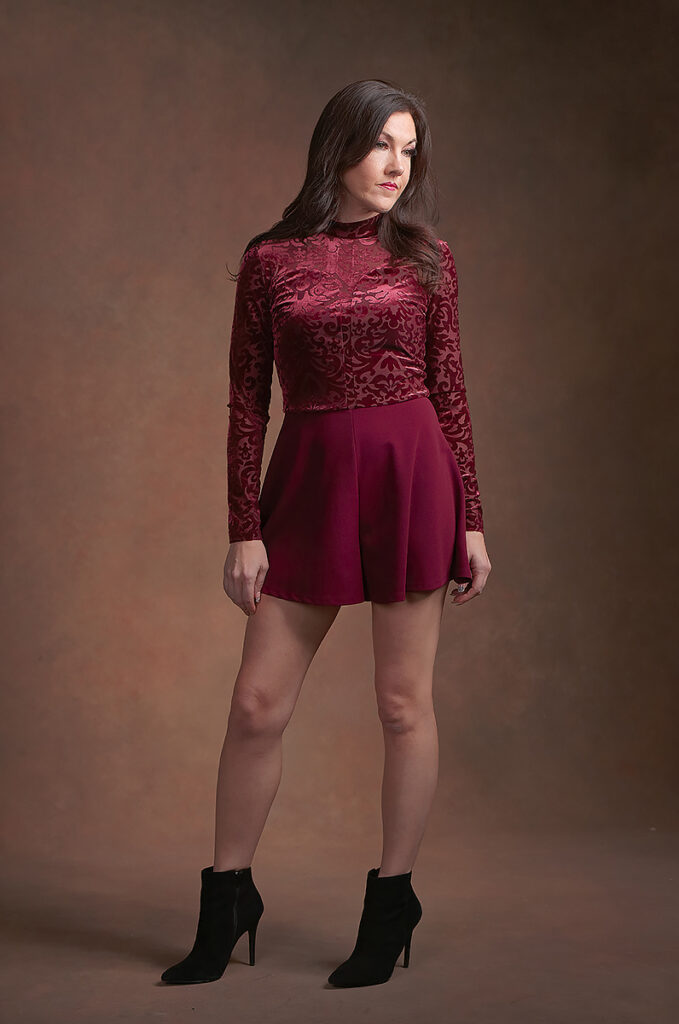
In my edits I chose to increase the contrast and try to remove some of the warm tones to really get the subject of my photo to pop off the background. Whatever you choose to do just make sure you use adjustment layers only for this edit. If you’re using another program besides Photoshop go ahead and save your edits as a preset or profile whatever the case may be.
Remember to ONLY change the colors, HSL, curves, gamma, and contrast of your image. Do not sharpen, remove noise, or make any other structural change to the pixels.
The image below is the result of my edits using only Photoshop’s adjustment layers.

Create the initial HALD
Now that I have my Adjustment Layers all set in Photoshop it’s time for the next step, which is creating the LUT using our LUT generator.
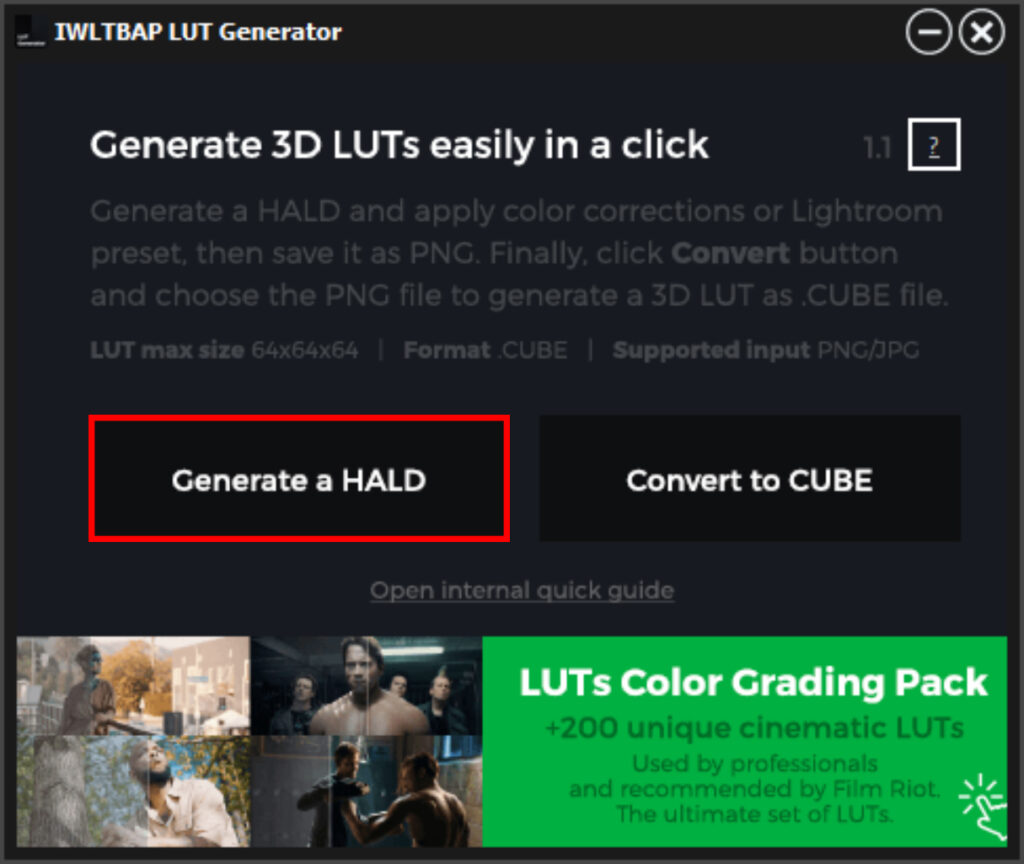
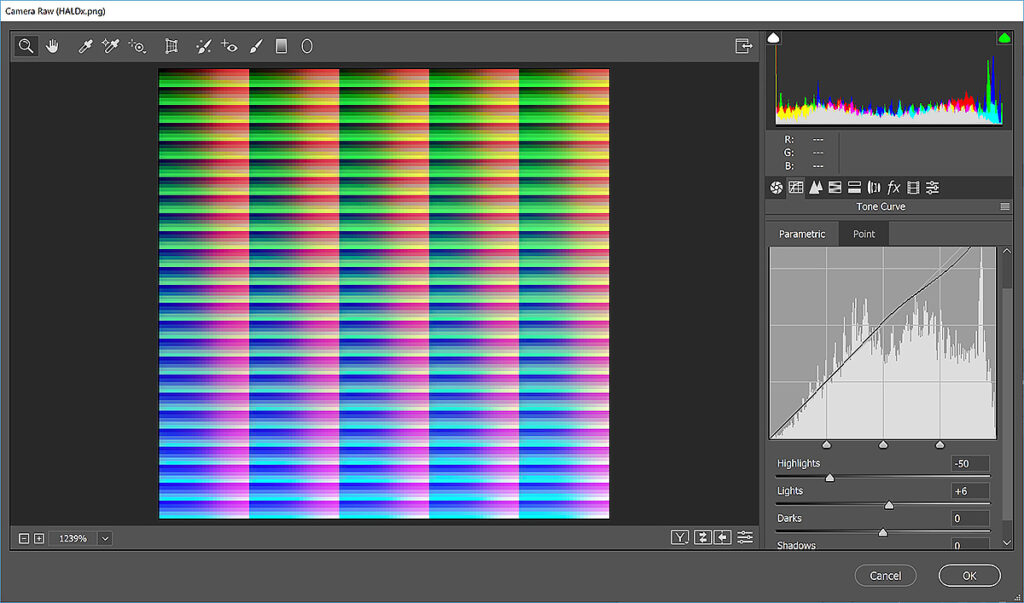
Go ahead and open up the LUT generator I had you download earlier and click Generate a HALD. The HALD is the image we will be applying our adjustments to in Photoshop or editing program of your choice. We need to use a HALD in order to combine the effects of multiple programs or filters in Photoshop. You can name this HALD whatever you want that makes it easy to remember as it is essentially a representation of your LUT that you can edit later.
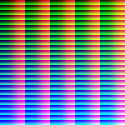
The HALD file looks kind of like a rainbow.
Choose where you want to save your HALD file then open the HALD file in Photoshop. Now you can just drag all your adjustment layers from the image you edited earlier into your HALD file.
Save the HALD file with your edits applied to it as a PNG. Below you can see my HALD files side by side, the one of the left is the original and the one on the right is modified by the adjustment layers in Photoshop.

Create your .CUBE (LUT) file
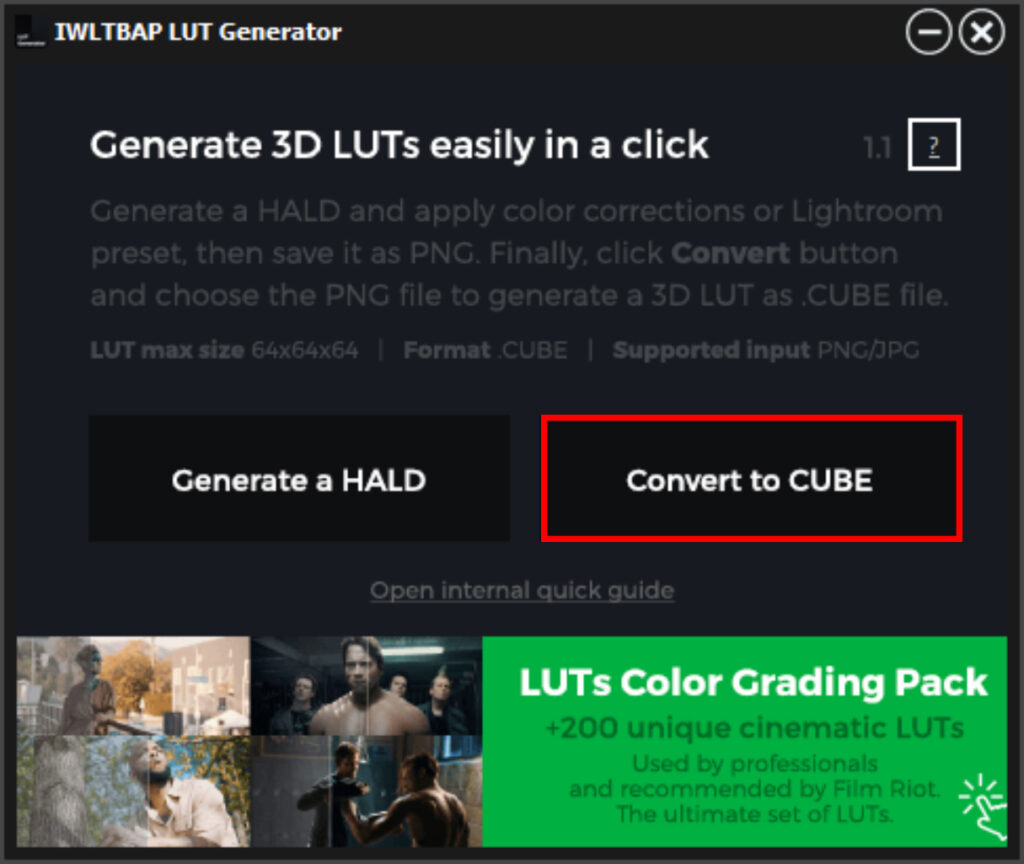
Now go back to the LUT Generator and select the option to create a CUBE file. After clicking the convert to CUBE button just navigate to where you saved the PNG of the HALD with your edits applied to it and select the modified HALD.
This will create a CUBE file in the same directory as the HALD that you can now use in any program.
Now check out the LUT you just made in Photoshop by adding a Color Lookup adjustment layer on your original photo and loading your LUT into it. You should see that the LUT produces the same result your adjustment layers did.
Congrats you made your first LUT using a HALD file, exciting wasn’t it?
Further edit the LUT
Now that we know how to do that let’s take it a step further. For the next example we will use the Camera Raw Filter in Photoshop to further manipulate our LUT.
Go back to the image you were editing and save the edited version (with your LUT applied) as a .JPG then open the newly saved JPG in Photoshop and start the Camera Raw filter. Now make some adjustments using Camera Raw. Remember to turn off anything that changes the structure of the image like noise reduction. That basically means you can use curves (shadow/highlights is a curve adjustment), contrast, and HSL sliders.
After you’ve made some adjustments save what you did as a preset in Camera Raw.
Now reopen the edited HALD image you applied adjustments to earlier and apply the Camera Raw filter preset you just made to the HALD.
Then save the HALD and recreate your CUBE using the newly adjusted HALD file.
After that is done you can go apply your new LUT to your original image and you should see all your edits combined into one LUT, the original Adjustment Layers, and the Camera Raw filters.
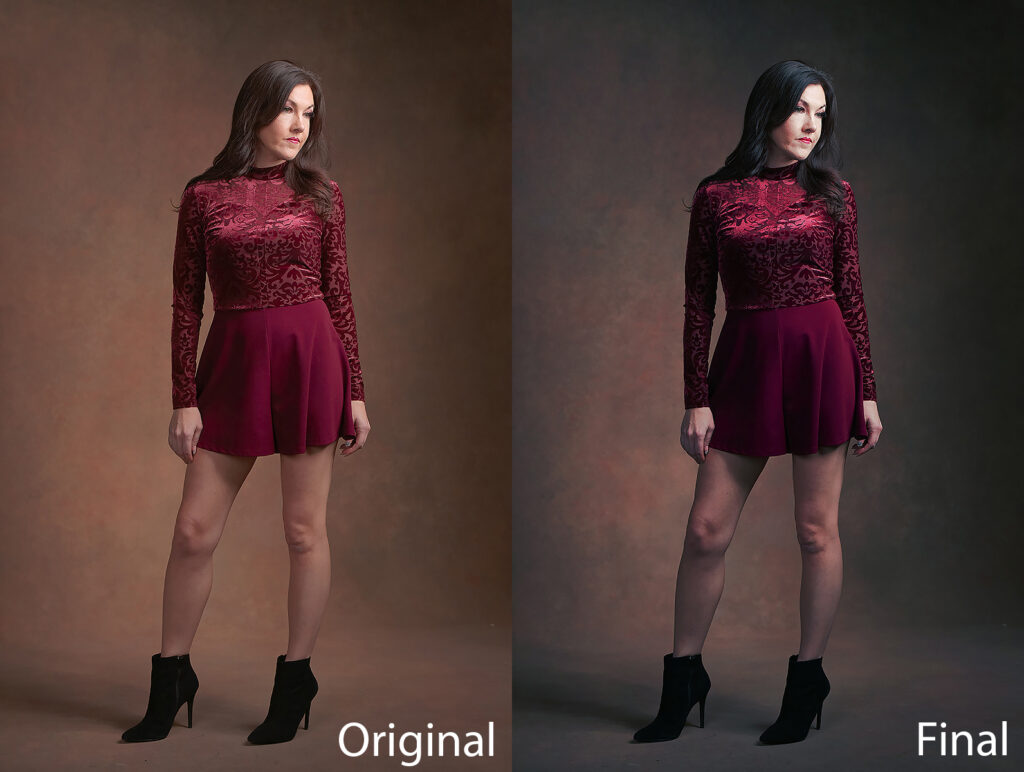
Below is my image with the finished LUT applied containing the effects of my adjustment layers and the Camera Raw filter.
In my Camera Raw edits I toned down the highlights, tweaked the color sliders and tried to get slightly more pop off the background. I think it looks pretty good. Below is a side by side of the original and all my edits applied as a LUT.
Use your LUT in your workflow!
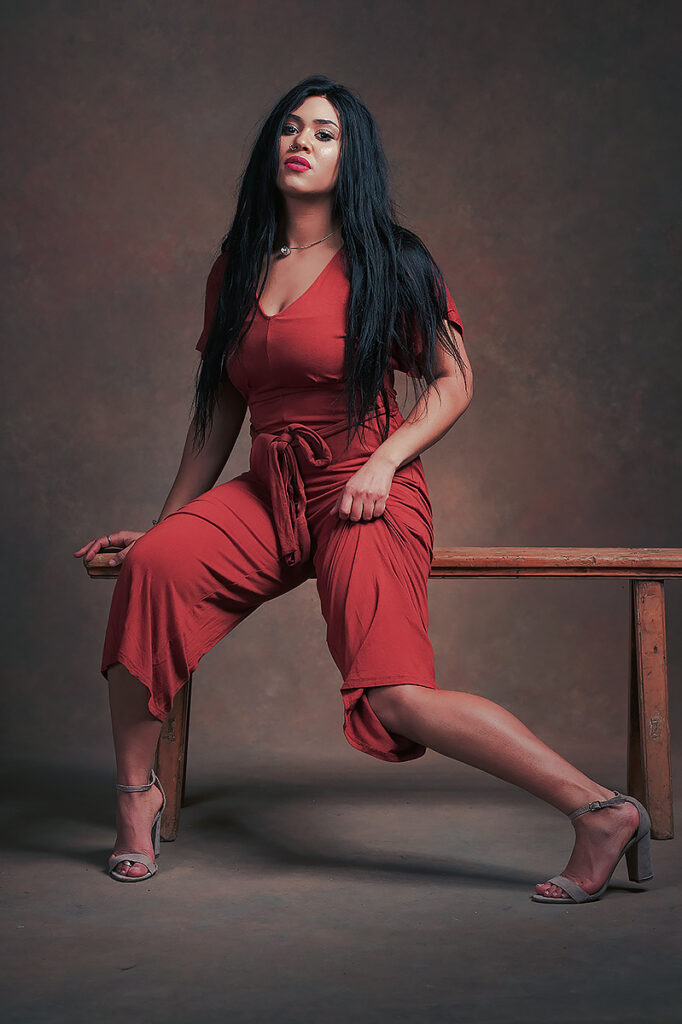
Start using the LUT in your work! Here is another image from this shoot that I applied my finished LUT to. I think the LUT worked well here.
It’s fun to distill down your work to a button click by using a LUT.
Download my free LUT!
If you like the LUT I created in this tutorial just click here to download the .ZIP file of it.
Final thoughts
You might ask why do all this? Well, you don’t really need to do it, but some programs do offer a little bit different approach to editing curves, hue, saturation, and luminance. It’s a matter of preference, if you like how a certain program allows you to control the highlights or something like that but you dislike having to open your files in multiple programs you can basically export those edits using the HALD file and create a LUT that you can use in the program you prefer to do your primary edits in.
I really like the simplicity of using a LUT. It’s just one setting and it can make what would require a complex series of adjustments using Photoshop’s adjustment layers much simpler. That said, there are definite limitations to LUTs, they only affect color globally, so there’s no way to provide for more complex effects like adding micro-contrast to your image.
LUTs are specifically geared toward color grading but it would be interesting to see if LUTs could be expanded upon somehow in the future.
I hope you found this exploration of LUTs useful. Let us know what you thought about the tutorial or LUTs in general in the comments below.
4 Comments
great tutorial, thank you for taking the time to post that.
Just thought I would let you know that I found a couple of sites that supply FREE .CUBE luts for people to play with:
https://tdcat.com/downloads/free-lut-packs
https://www.rocketstock.com/wp-content/uploads/2017/03/35-Free-LUTs.zip (direct link to down, as the website link is broken)
Hope that these help someone, and LUTs are definitely a great way to get consistent and unique looks to your images!
Kevin
Thanks Kevin I appreciate you taking the time to share those resources with our readers! It’s always fun to mess around with the LUTs in Photoshop, I have gotten a lot of editing ideas just doing that! I wish Adobe would add LUTs to Lightroom just because editing multiple images is so much easier in Lightroom compared to Photoshop. Plus I love the fact that you don’t have to save the image all the time in Lightroom.
o well coulden’t get it to work . must try harder!!
What part is not working?