In this post I’m going to show you how to copy and even improve upon night mode using any camera and Photoshop.
“Night Mode” exists because when we take pictures at night the camera sensor doesn’t receive enough light to make a clear image. What ends up happening is that noise takes over the image and makes it ugly. The thing to understand about the noise is that it is mostly random. The fact that it is random is a really good thing because it means we can average out the pixels between images to remove noise.
In order to average out the noise night mode uses a technique that is already established in photography called “Image Stacking”. Image stacking is actually used by astronomers to increase the quality of their images, so it is a powerful and proven method for lowering noise in images.
Photoshop makes image stacking super easy, although you may need a pretty fast computer to work with the files it makes.
Ok, enough back story, here is how you do it:
The first thing you need to do is get a bunch of noisy images of the same scene. To do this you’ll want to either use a tripod or carefully shoot handheld. The images don’t have to be perfectly aligned, but the closer you can get the better. We will align the images automatically with Photoshop. And if your camera has a burst mode, you’ll want to use that as well. If you’re shooting handheld be sure to use the right shutter speed to get sharp images. If you have to crank up the ISO, do it! The whole point of this exercise is to remove the noise caused by using high ISO settings. You don’t need a ton of images to make this work either, even having just 2 will work wonders, but for this example let’s try 5.
Once you have your images to work with loaded into your computer proceed to the next step.
You can load your RAW files directly when doing this, you don’t have to use .jpg, but it might run a little faster if you use .jpg.
Now, open Photoshop and go to File > Scripts > Load Files into Stack
Choose “Browse” and select your 5 images.
Before you hit “Ok” be sure to select “Attempt to Automatically Align Source Images” AND “Create Smart Object after Loading Layers”
Now Photoshop will place all your images into a smart object with all the images perfectly aligned to one another.
The next step is where the magic happens! With your Smart Object selected simply go to Layer > Smart Objects > Stack Mode > Median
Once it finishes processing you should see a dramatic reduction in the amount of noise the image has in it.
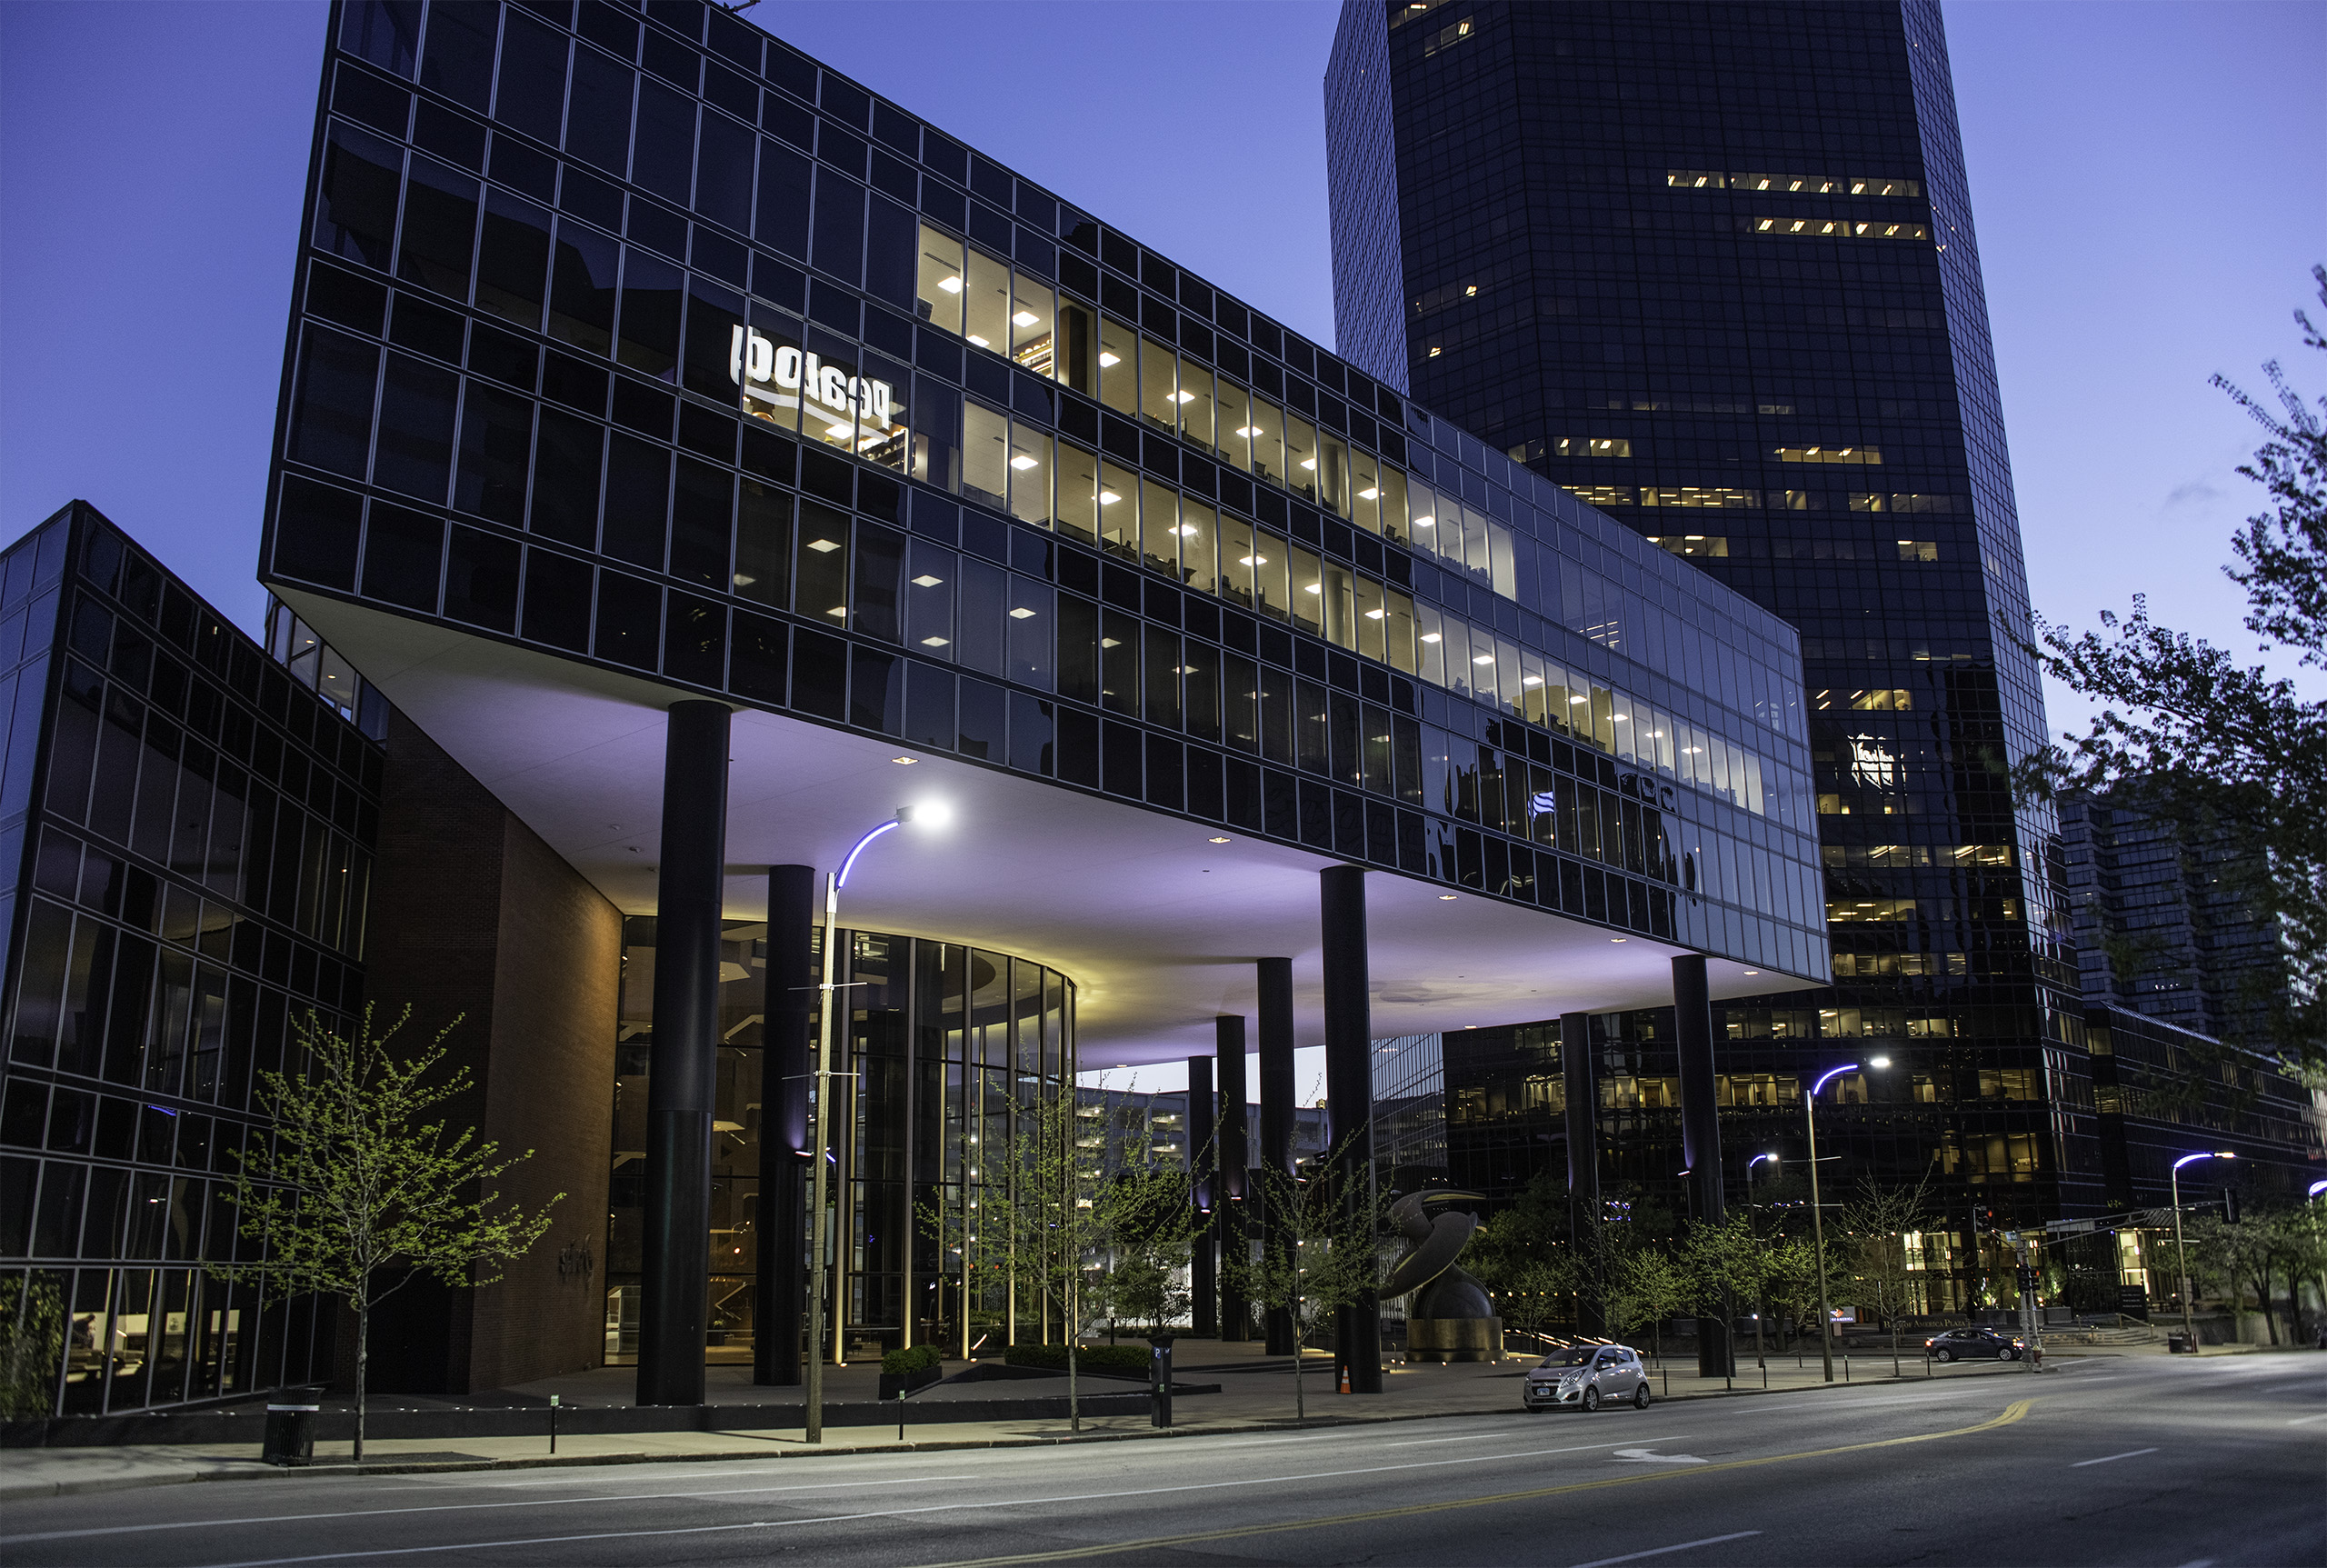
Below are 2 example images which I shot without a tripod at 6400 ISO. I would say the stacked result looks like it has the noise of a 400 ISO image. That is a massive improvement for a technique that is super simple and can be done without a tripod!


As you can see the noise is dramatically reduced. It only takes a minute to do and the results are awesome.
Below is another close up view of the noise. What’s really cool about this method is that details come back into the image the more images you stack. In the noisy image it’s impossible to make out individual bricks, but in the stacked image you can see the vertical lines of individual bricks.


As you can see, image stacking is a powerful tool that lets you remove noise from your images in the same magical way the iPhone does with “Night Mode”. What’s really great is that this technique can be performed manually with images from any camera.
The closeup below really shows how the details come back into the image when stacking.
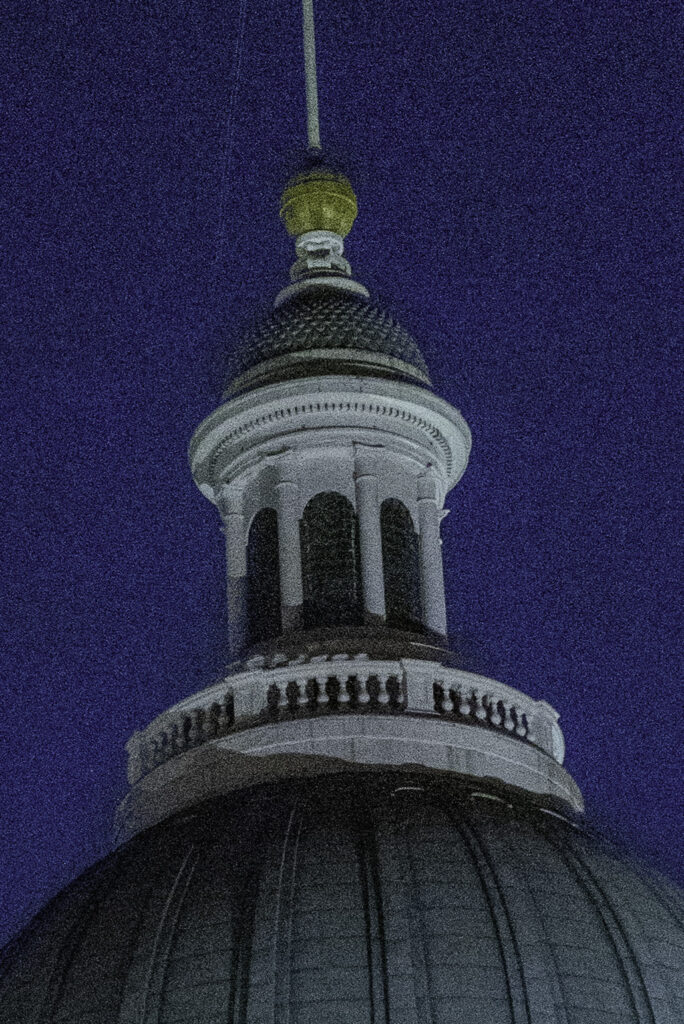

It may look as if noise reduction has been applied but it has not. No noise reduction of any kind has been used on the images, the noise is only removed by the process of aligning, stacking, and blending the images using the “median” function.
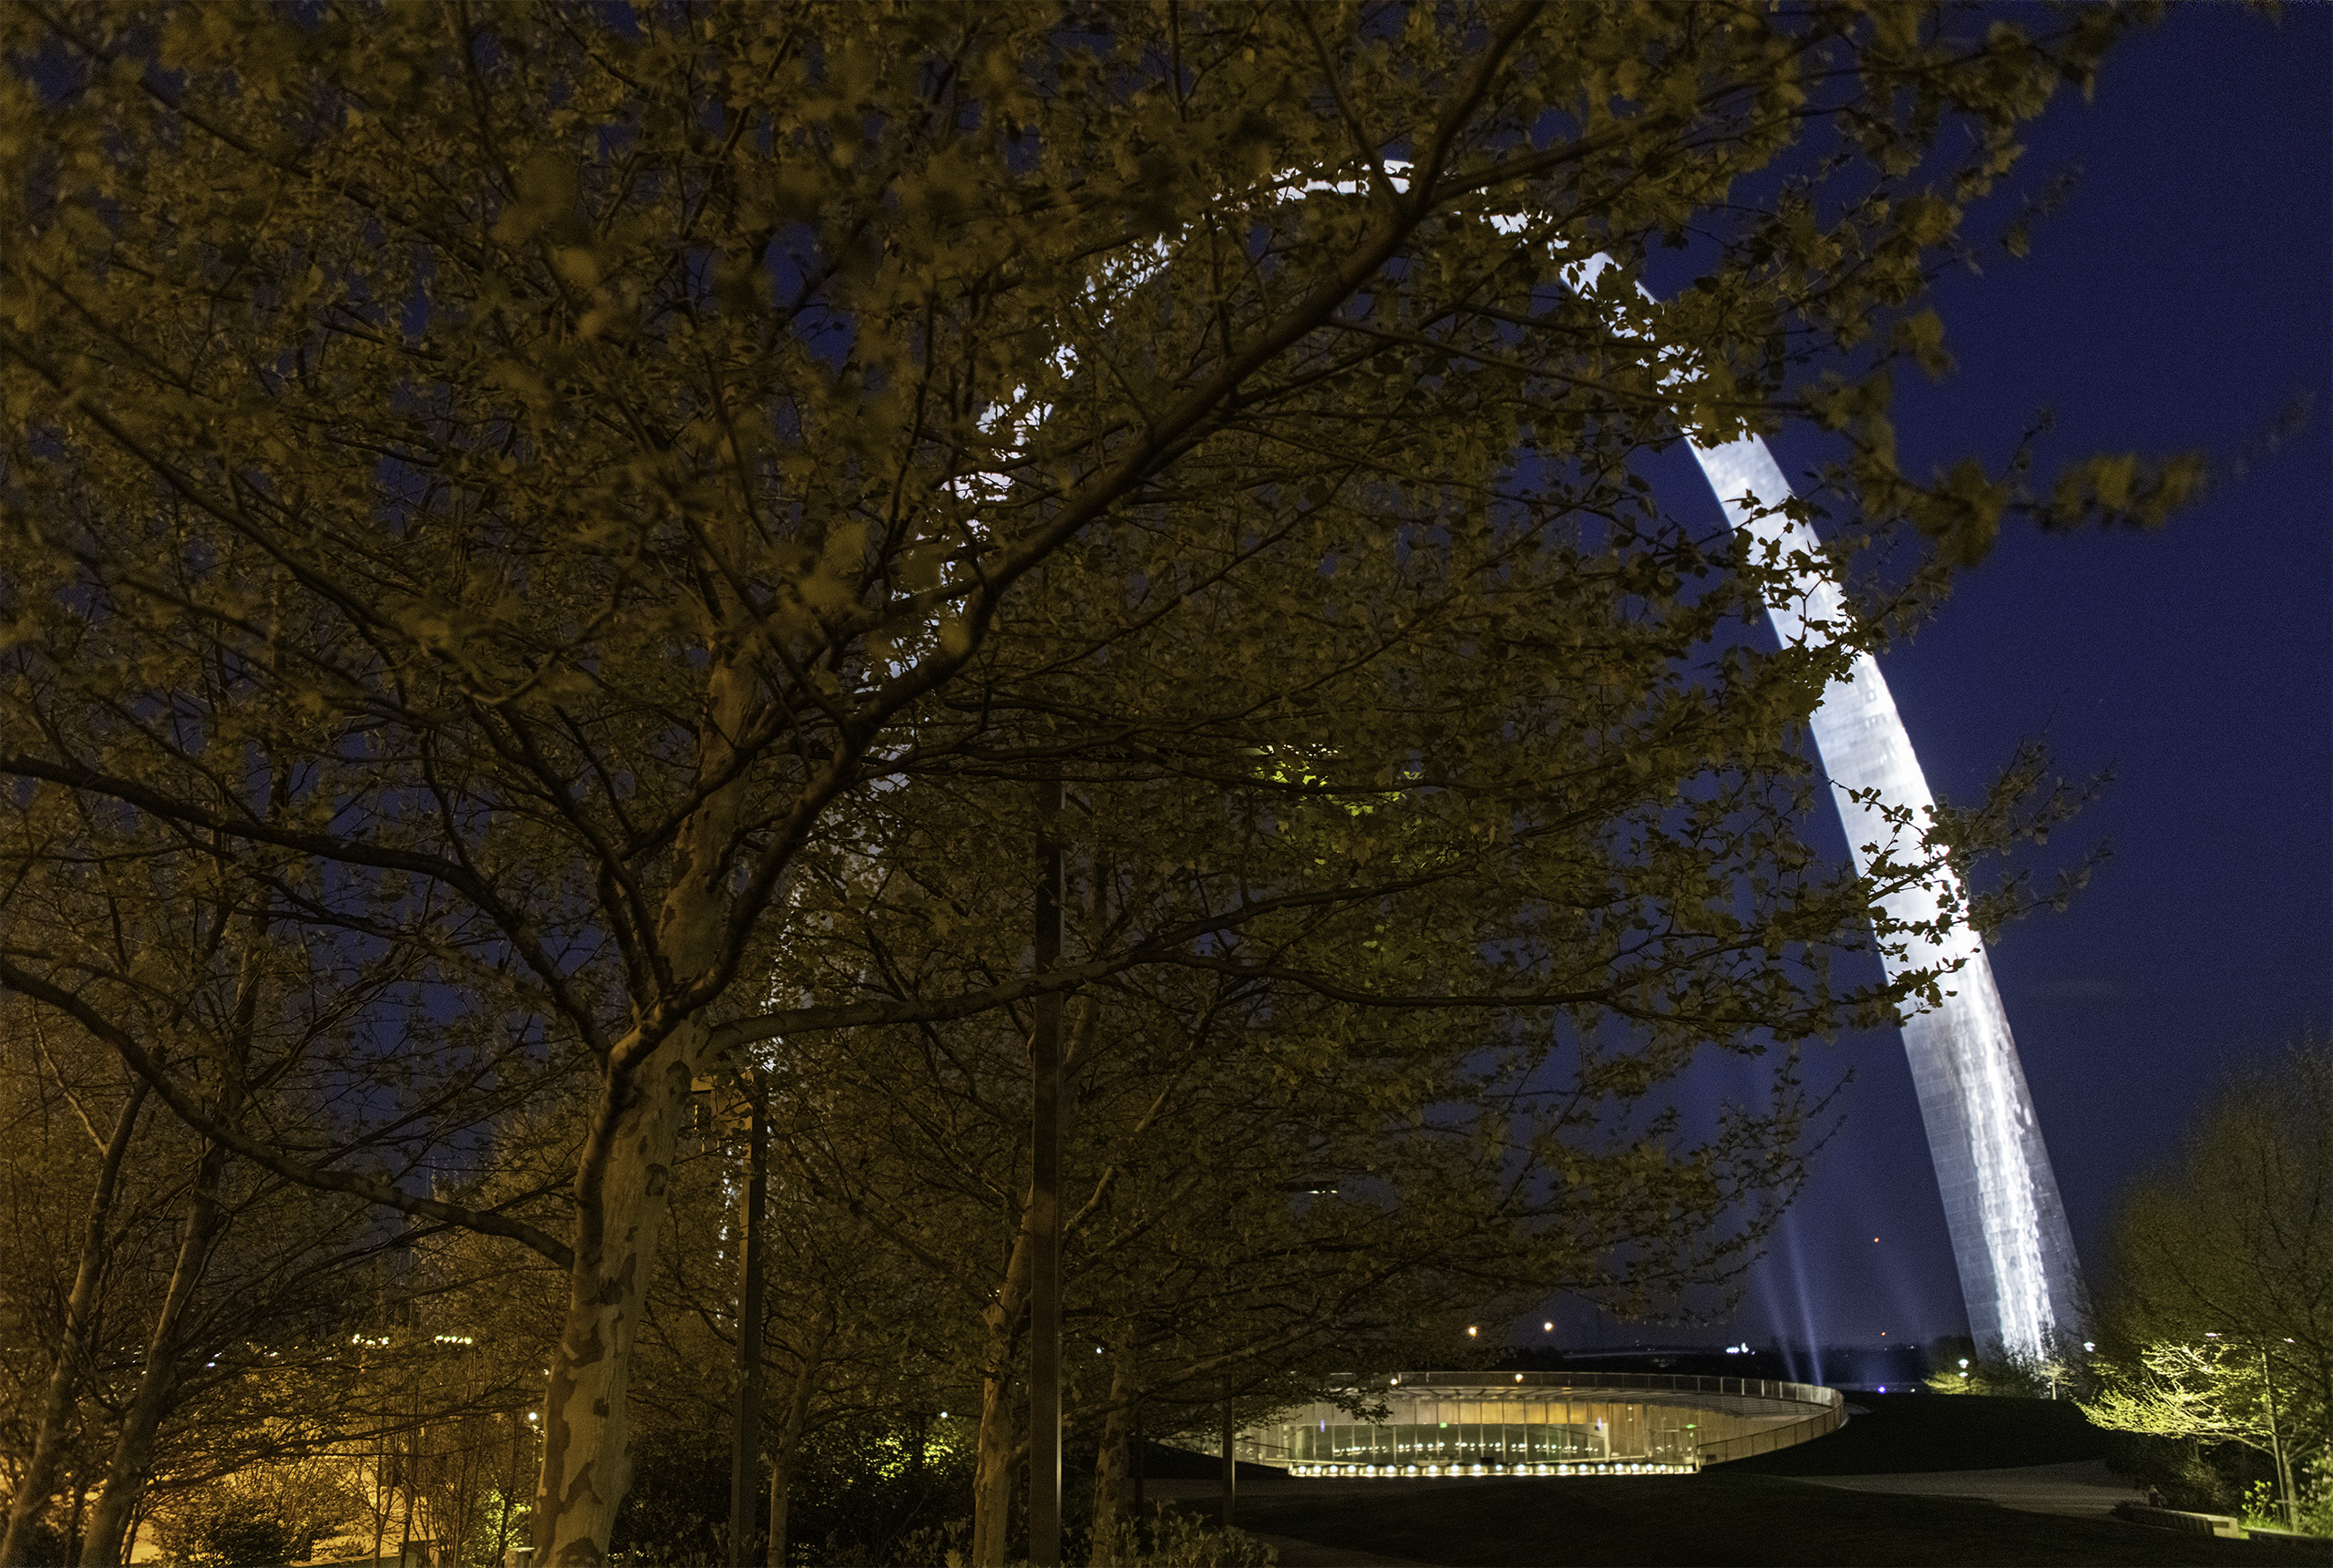
Below are a few more examples. All these image stacks were shot without a tripod using burst mode on my EOS R. Using a tripod would probably improve details around the edges of the images where some slight perspective changes can occur due to camera movement when shooting hand held. However, I think these results are still really good.


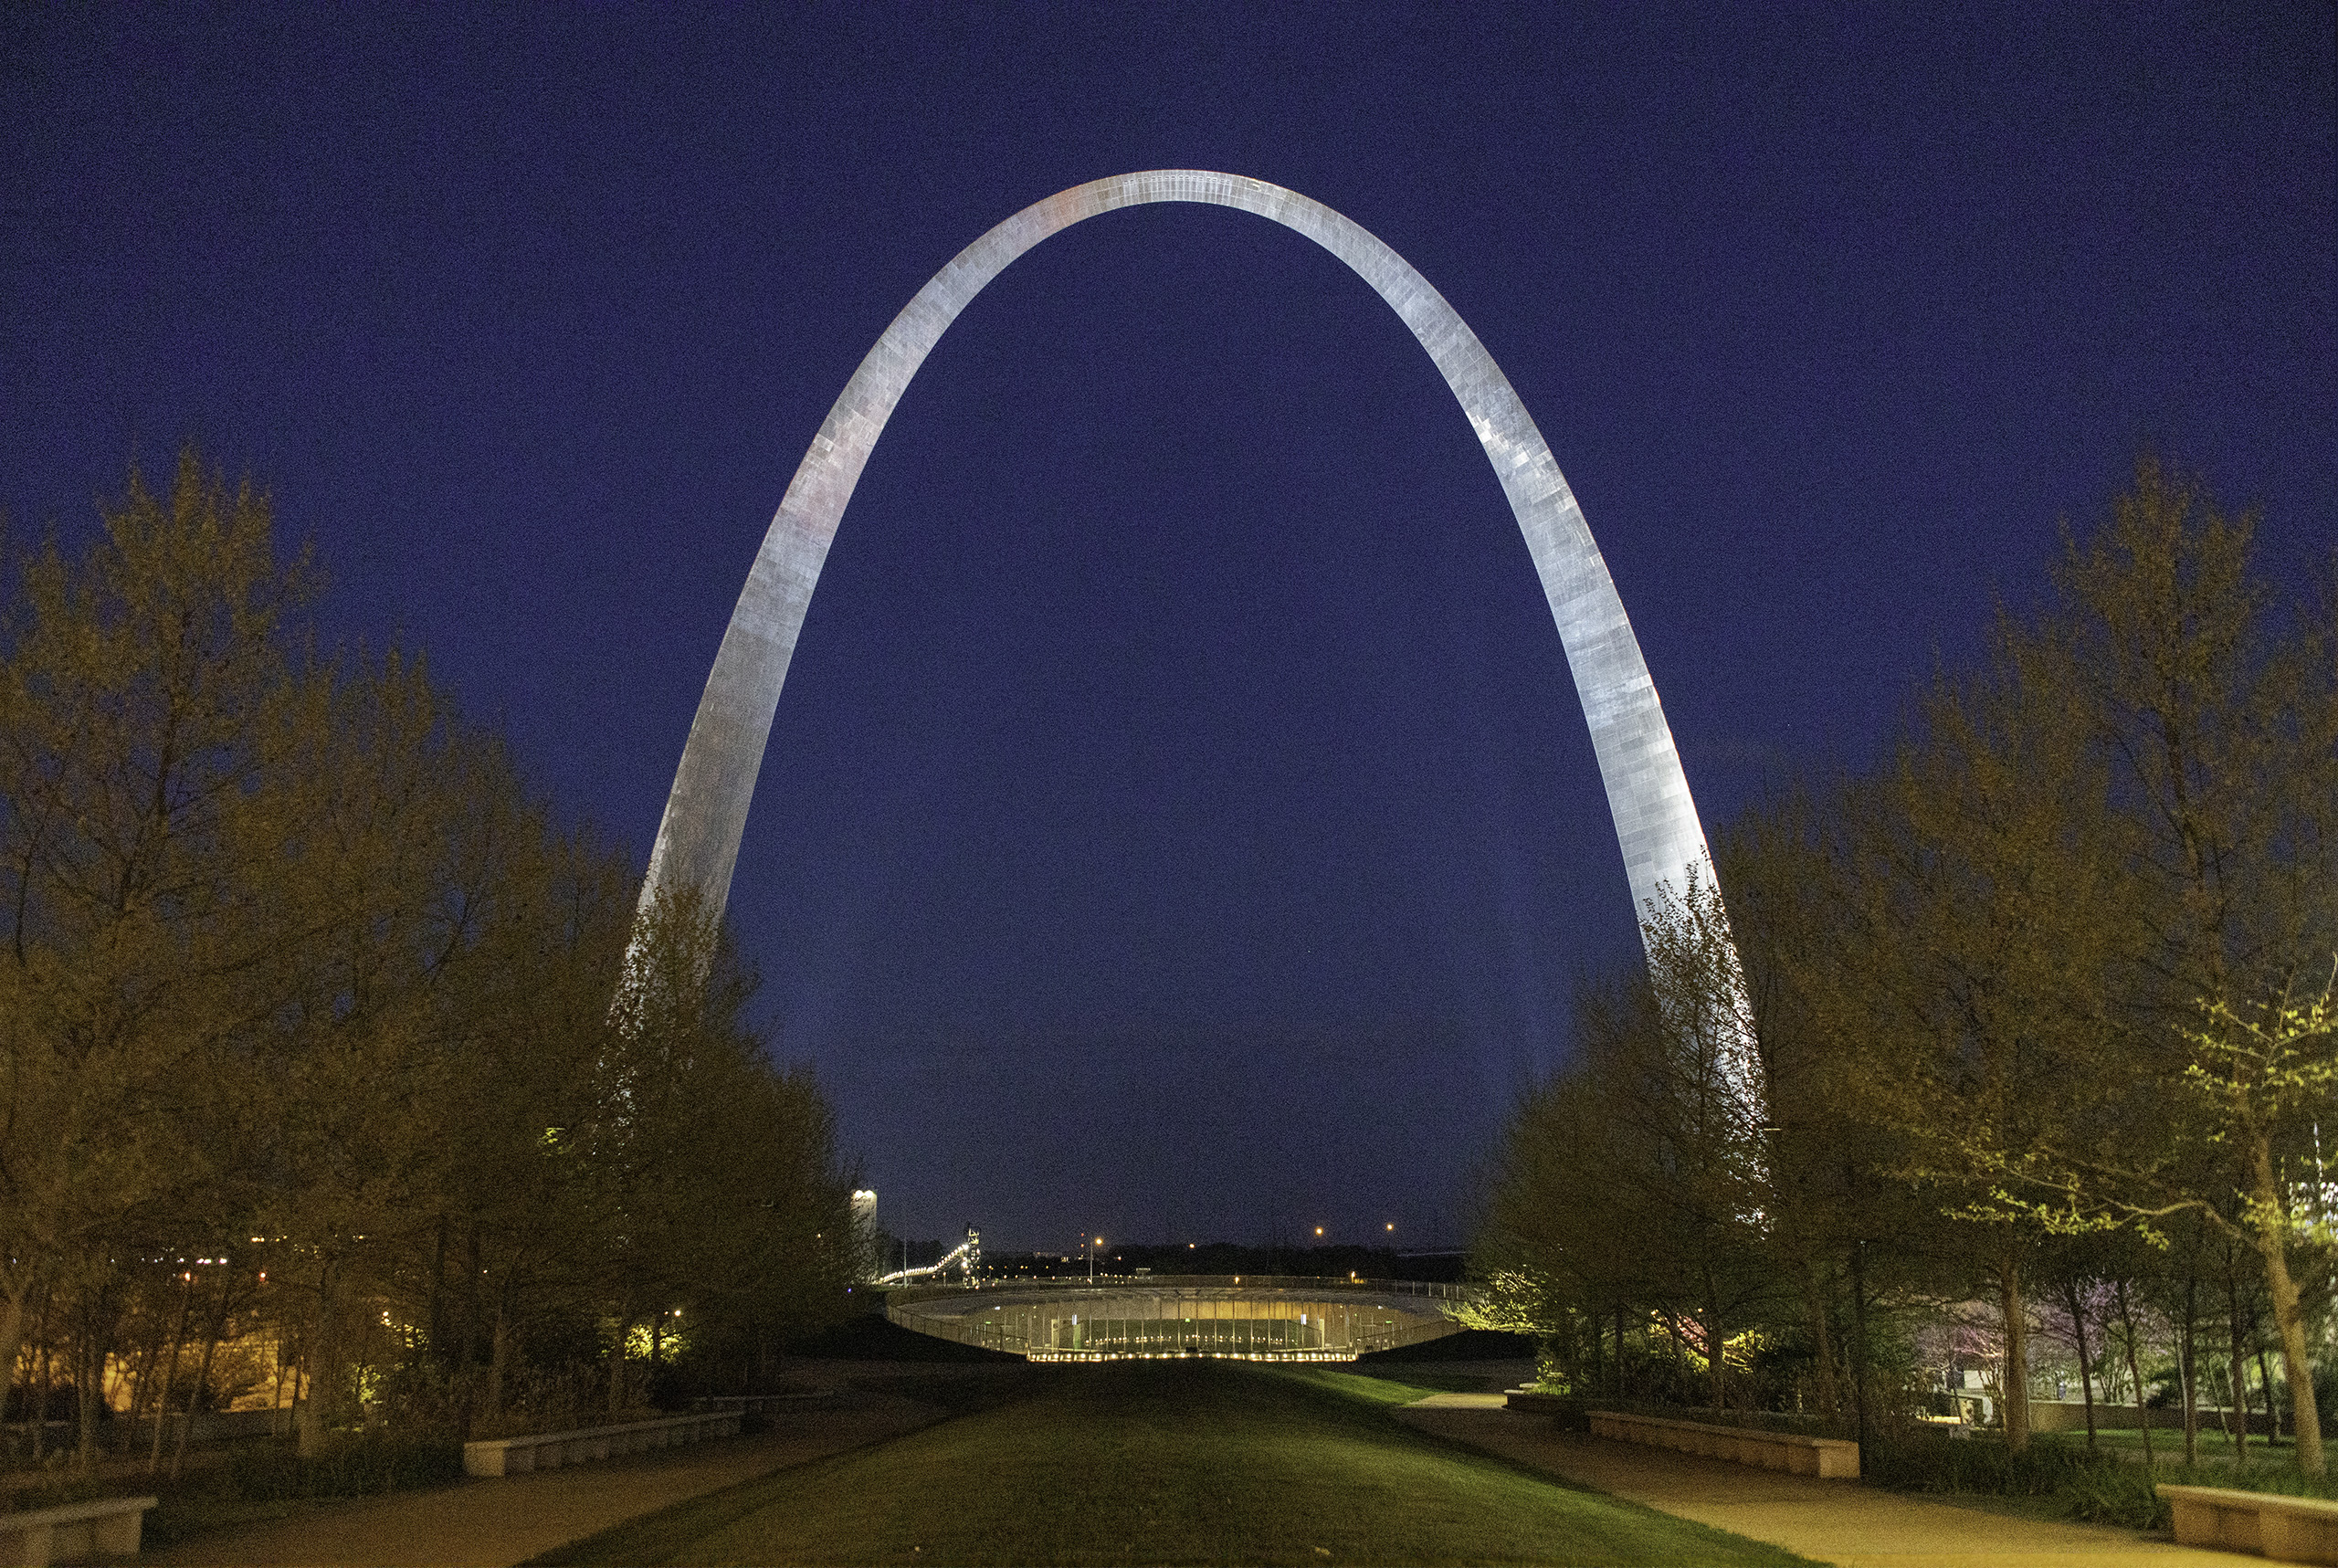
Shot at 5000 ISO

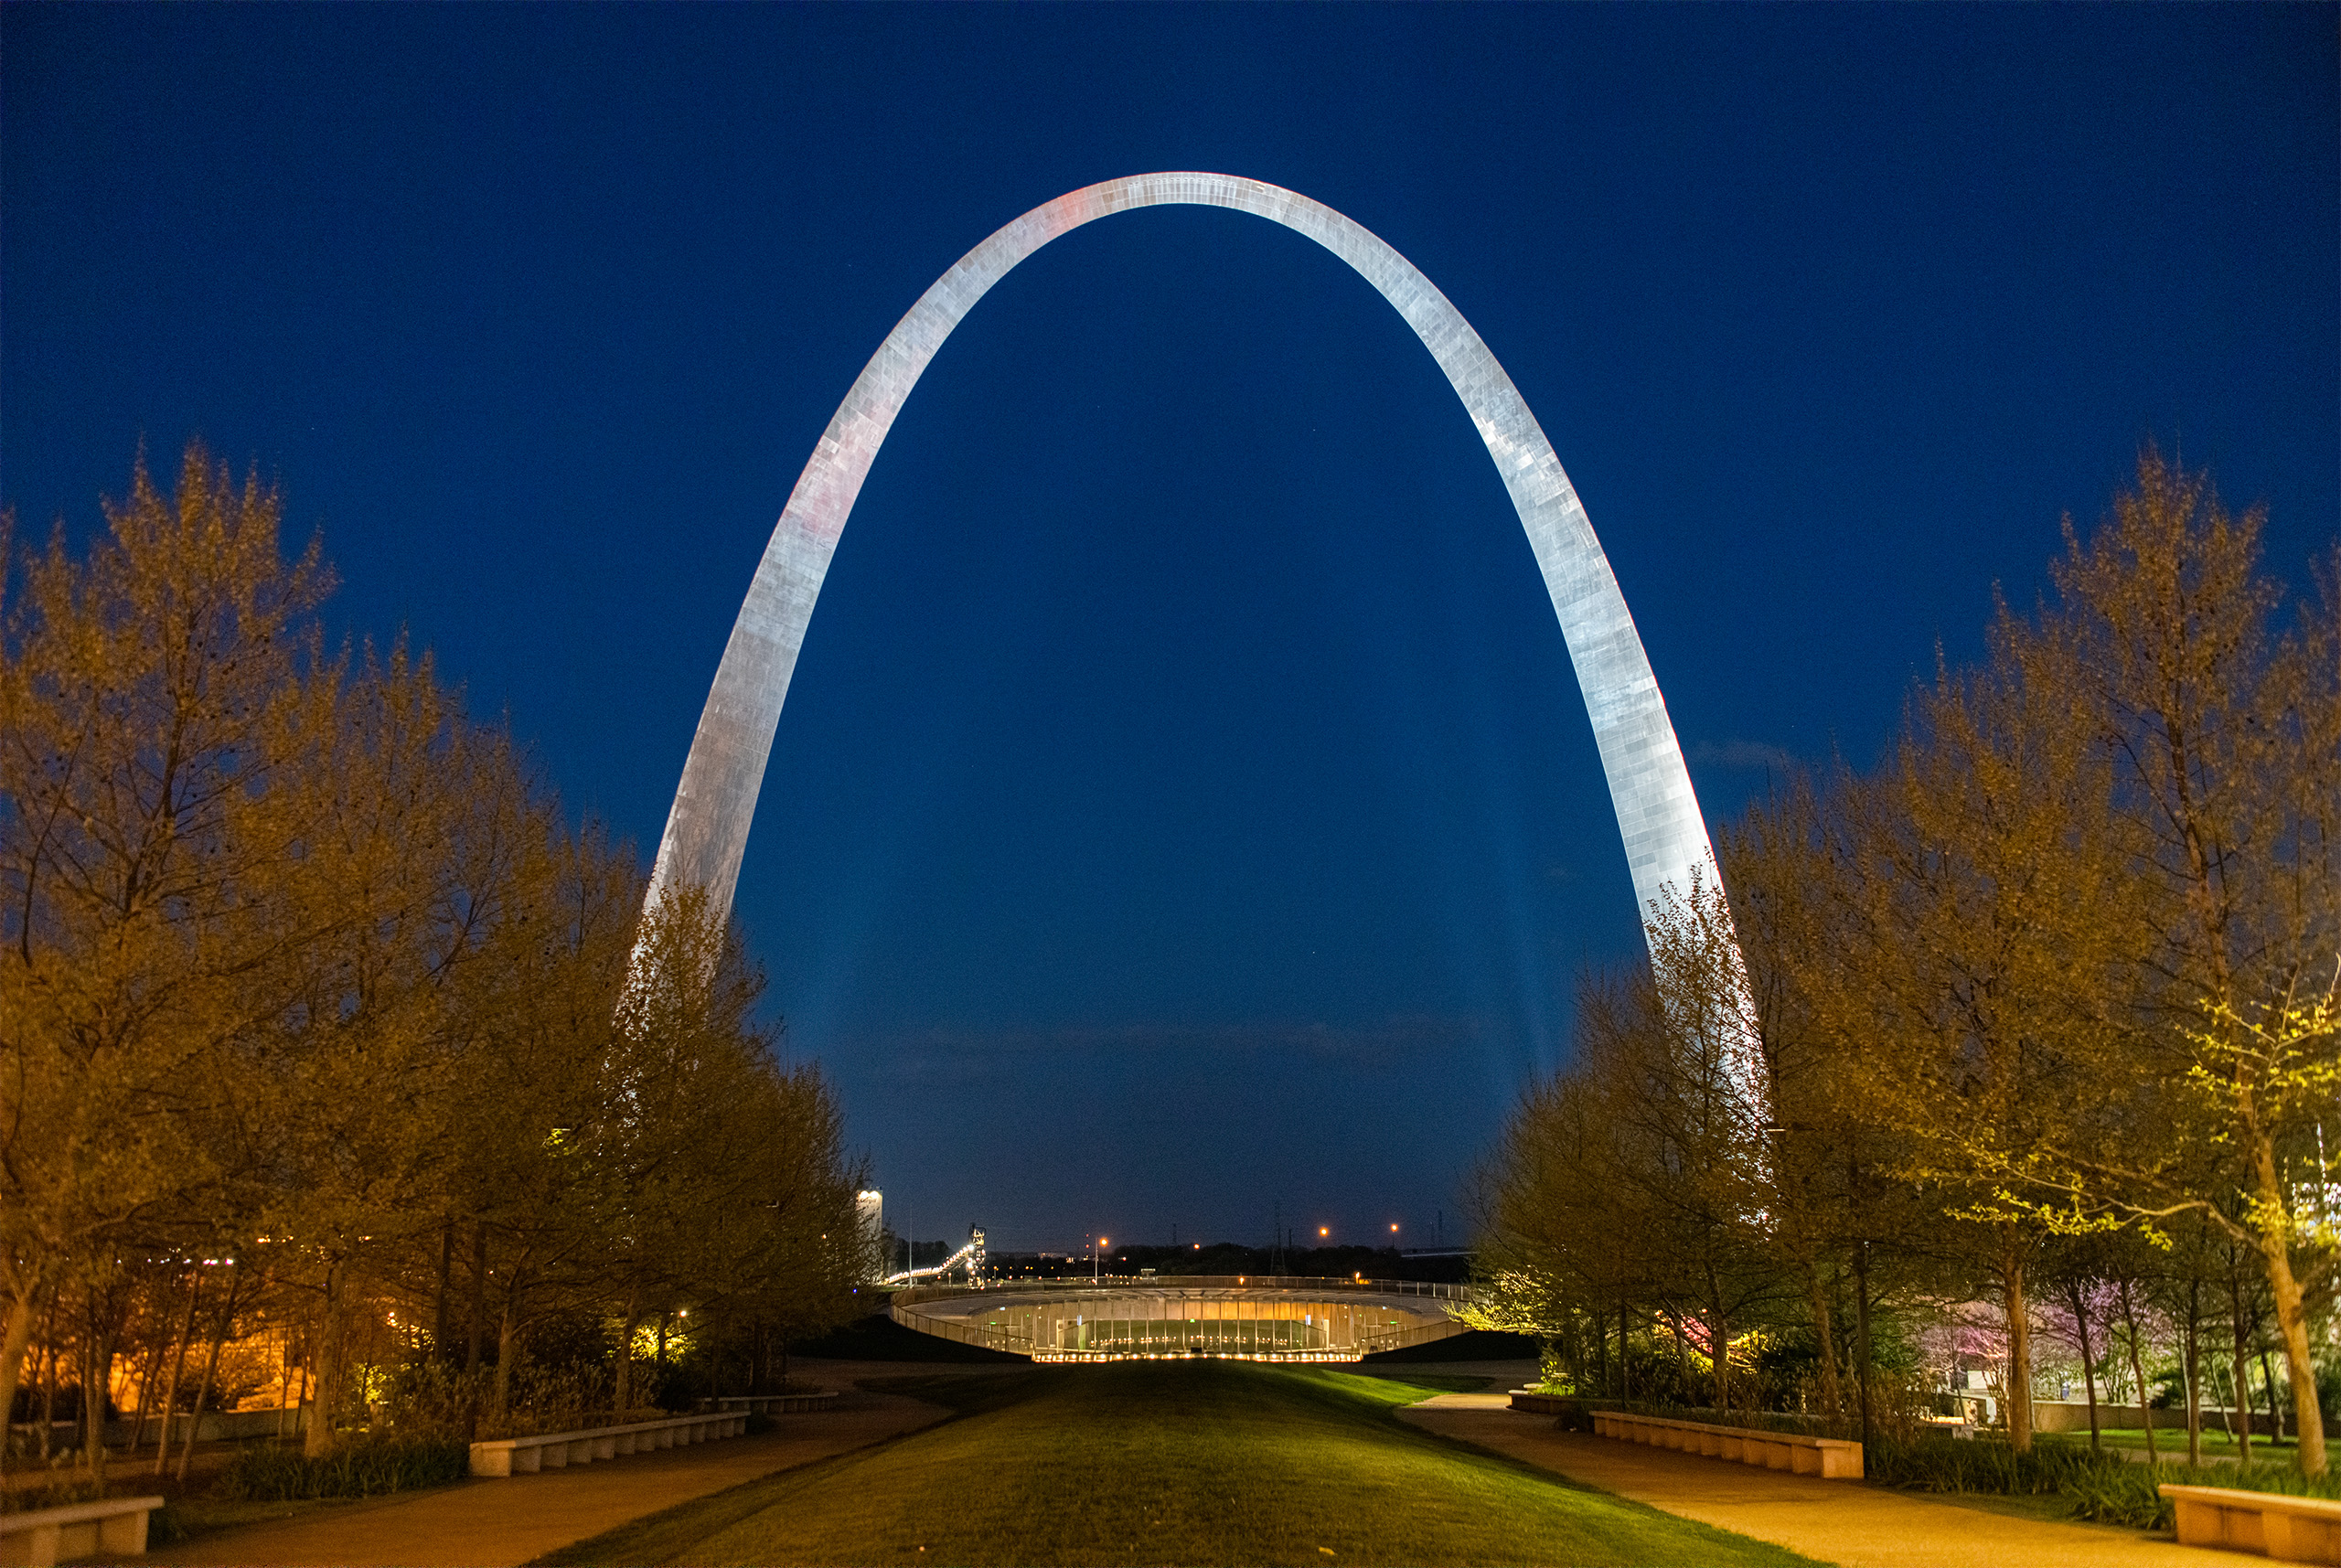
Shot at 5000 ISO

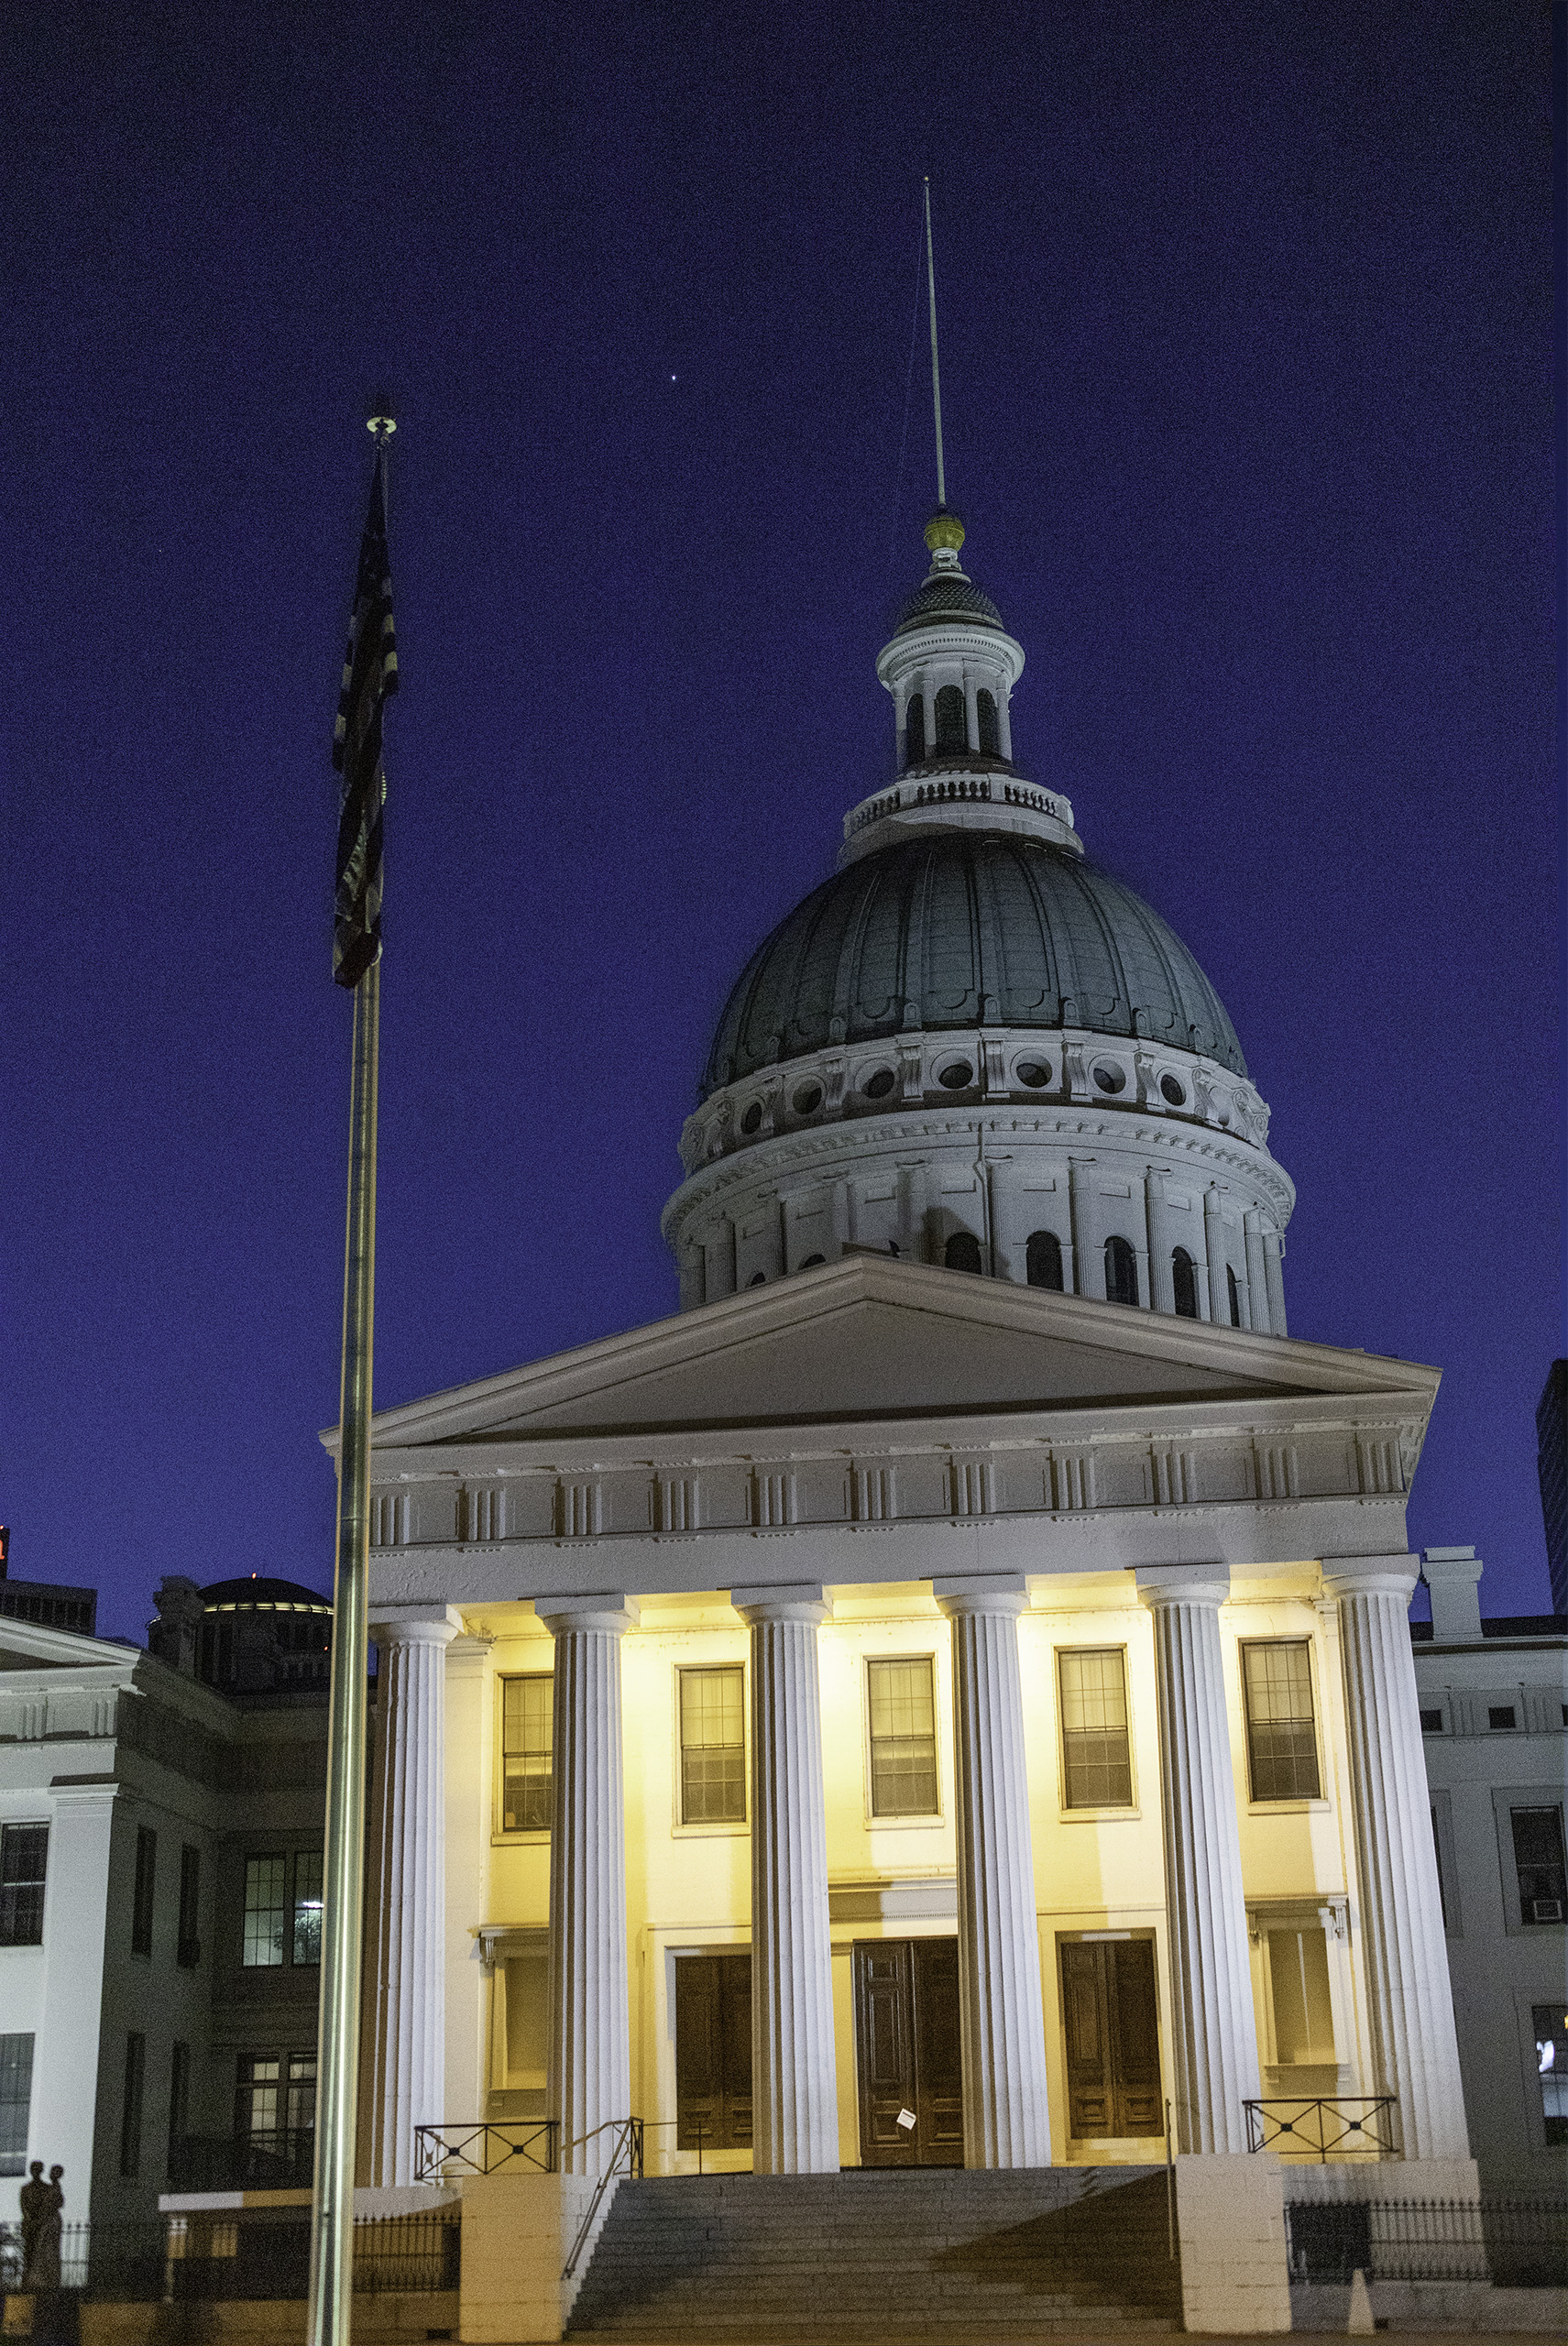
Shot at 25600 ISO
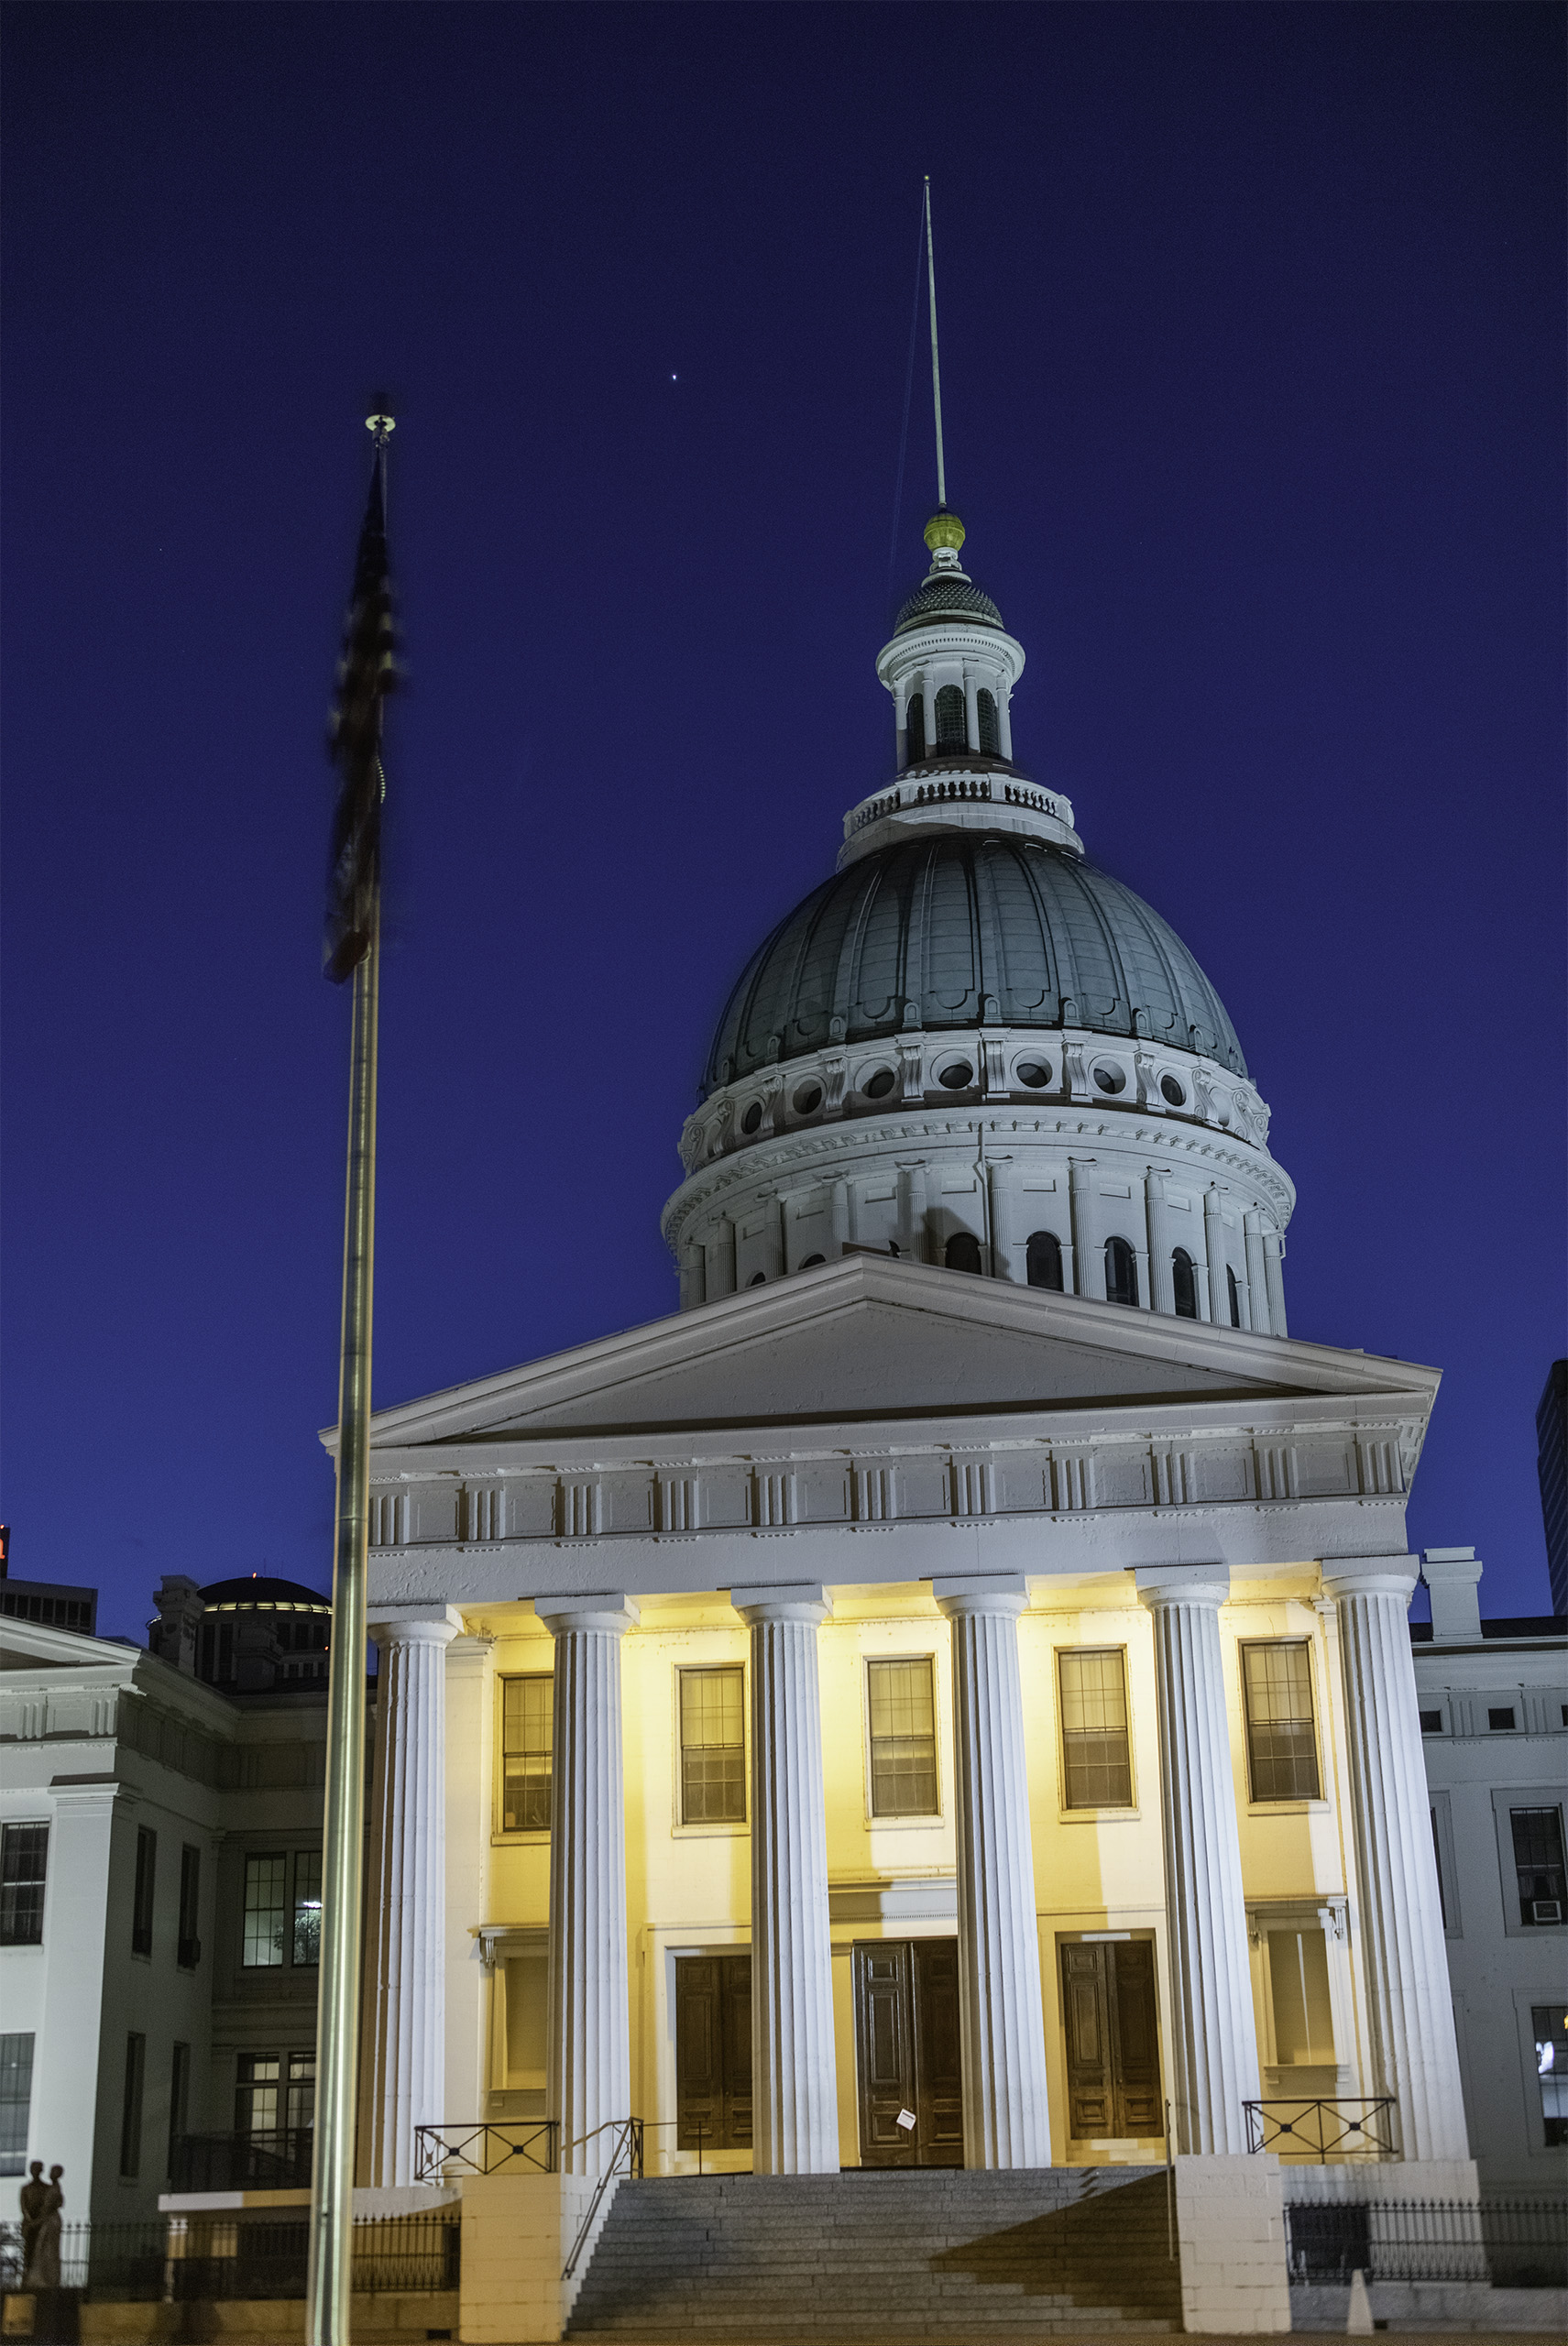
Shot at 12800 ISO
Shot at 12800 ISO
Even though this method is quite powerful I tend to avoid using it because it is best done on a tripod and its tough to go everywhere with a tripod. It’s also one of those methods that will cause a drastic increase in the number of files sitting on your hard drive. Some files may have 500 megabytes of images stacked to produce one clean image. It’s not really something that can be done manually for every picture taken, but it is an interesting thing to know about.
Canon cameras do offer the ability to perform image stacks in camera, and while this is a useful tool in some cases, it only allows saving to .jpg on the EOS R5. Saving to 8-bit jpg seems contrary to the goal of this method which to maximize image quality. But it is an option for those who don’t want to save tons of extra files on their computer or cloud storage.