
As photographers, we are all too aware of how the sky can effect our photographs. Whether it is a hint of blue peeking through some clouds or full blown sky-scapes dominating a scene – if you don’t get the sky right, your photo ends up having less impact than it should. While you can’t change the weather, you can now quickly enhance the sky in your photographs with Luminar’s AI Sky Enhancer.
Luminar’s AI Sky Enhancer allows you can enhance the sky in your images in just one swipe. For any of you who have tried to perfect a sky through editing, you know that the manual process isn’t always easy and can be time-consuming.
So what does Luminar’s AI sky enhancer do?
Luminar’s AI sky enhancer does is analyzes your photo to detect the sky. Next it separates the image into different layers depending on what it detected.
Just how easy is it to enhance a sky with Luminar’s sky enhancer?
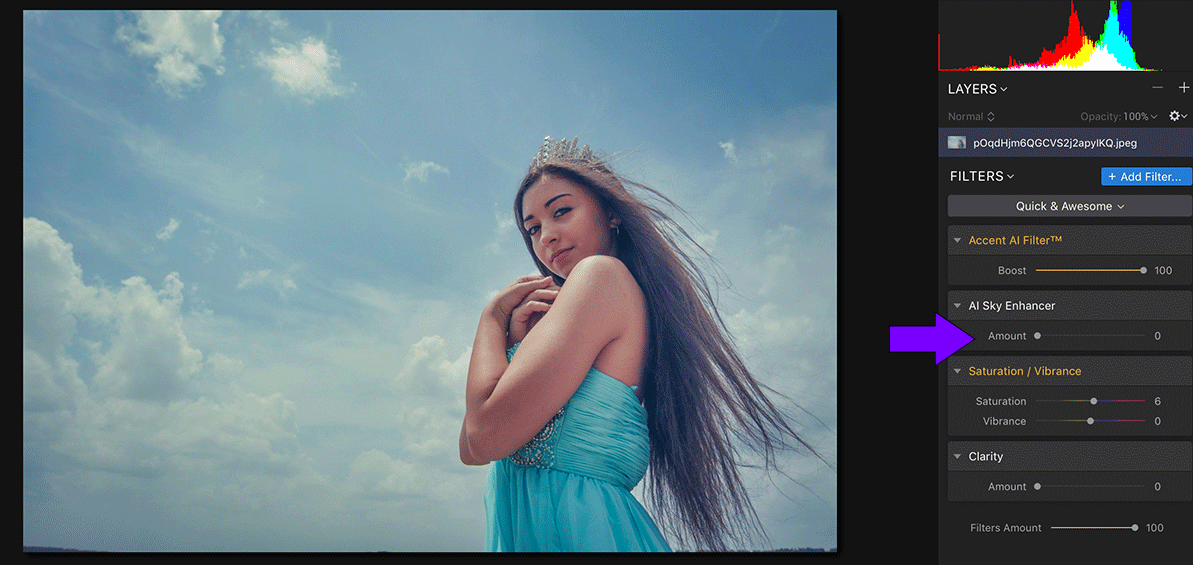
If you use Luminar, you know that they have built their software to aid photographers by making things quicker and easier to do. The AI Sky Enhancer is no exception. You literally pull a slider from right to left applying the sky enhancing effect as minimally or as generously as you want.
Luminar’s AI Sky Enhancer test-drive
I took Luminar’s AI Sky Enhancer for a test drive and were very happy with the results. What previously took several minutes for us to edit now literally takes seconds. What’s even better is that you have complete control over the results – you get to limit how much enhancement you want which allows you to keep your sky’s natural looking but also allows you to add drama when wanted.
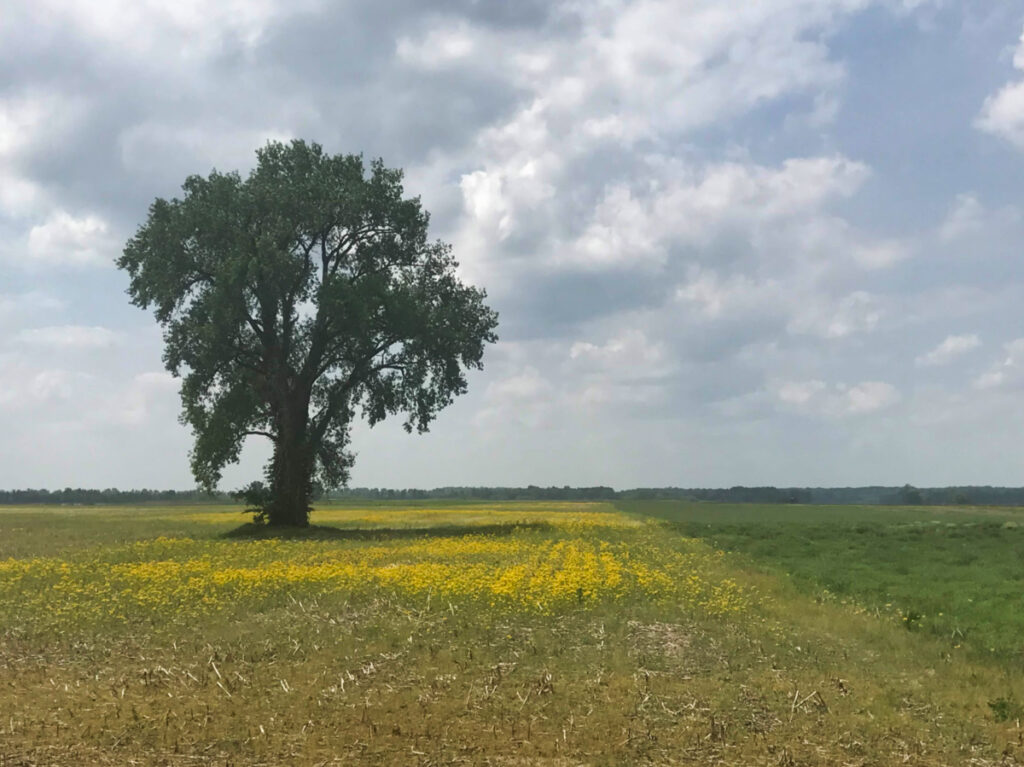
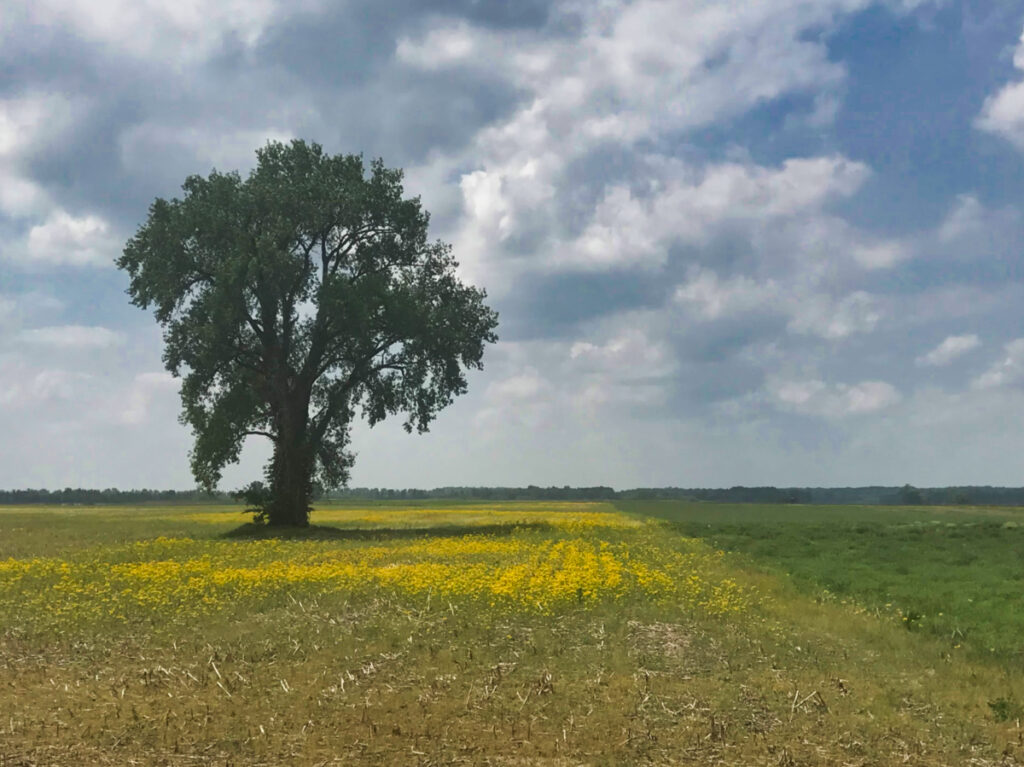
Sky Enhancer Test 1 – Overcast day
For the 1st
Sky Enhancer Test 2 – Small sky + clouds
For the 2nd


Sky Enhancer Test 3 – Masking
For the 3rd test I pushed the sky enhancer up to 84. I wanted to see how well it would deal with the sky versus the branches of the teepee in this photo. The sky enhancer did an enviable job at masking the sky, leaving the branches untouched.


Sky Enhancer Test 4 – Subject in foreground
For the 4th test, I used a photo that had a subject in the foreground and the sky filling out the background. Being able to simply drag the sky enhancer and watch the sky change made me do a happy dance. The subject in the foreground was left completely unaltered while the sky was given a richer color.


Sky Enhancer Test 5
For the final test, I ratcheted the sky enhancer all the way up to 100 – I really wanted to pop the sunset in this picture. The change here was pretty subtle, but it is a good illustration of what the sky enhancer enhances and what it does not. If you look at the image below you will see that the majority of the change happened in the upper segment of the photo. This is where the true portion of


Overall Impressions
I was impressed with Luminar’s sky enhancer. Using it on a regular basis in your photography workflow would result in huge time-savings. I’m not ashamed to say that I think the AI sky enhancer is better at editing skies than I am. It made subtle changes without over-dramatizing clouds and adding pops of color without looking fake. I also loved that it was very accurate in masking the sky even when there were sky-like elements in the picture.
About Luminar
Luminar is a great alternative to Photoshop and Lightroom for those of you who are looking for a very affordable software built from the ground up for photographers without the cost of a subscription. We’ve partnered with Skylum to offer $10 off of Luminar for Learn Photography Skills readers. To grab this discount use code